Construction Gantt Schedule Guide
This studio builds a construction site schedule in working days: tasks, milestones, phases, task links, cantonal holidays, critical path and safety milestones. It runs in your browser, without registration. The guide goes from the simplest to the most advanced.
- Getting started
- Reading and editing the schedule
- Links between rows
- The critical path and float
- Safety milestones
- Public holidays and non-working days
- Moving a bar with the mouse
- Display and target end
- Exporting and printing
- Using the keyboard
- What the Pro version adds
- Another template: renovation
- What this software does not do
1. Getting started
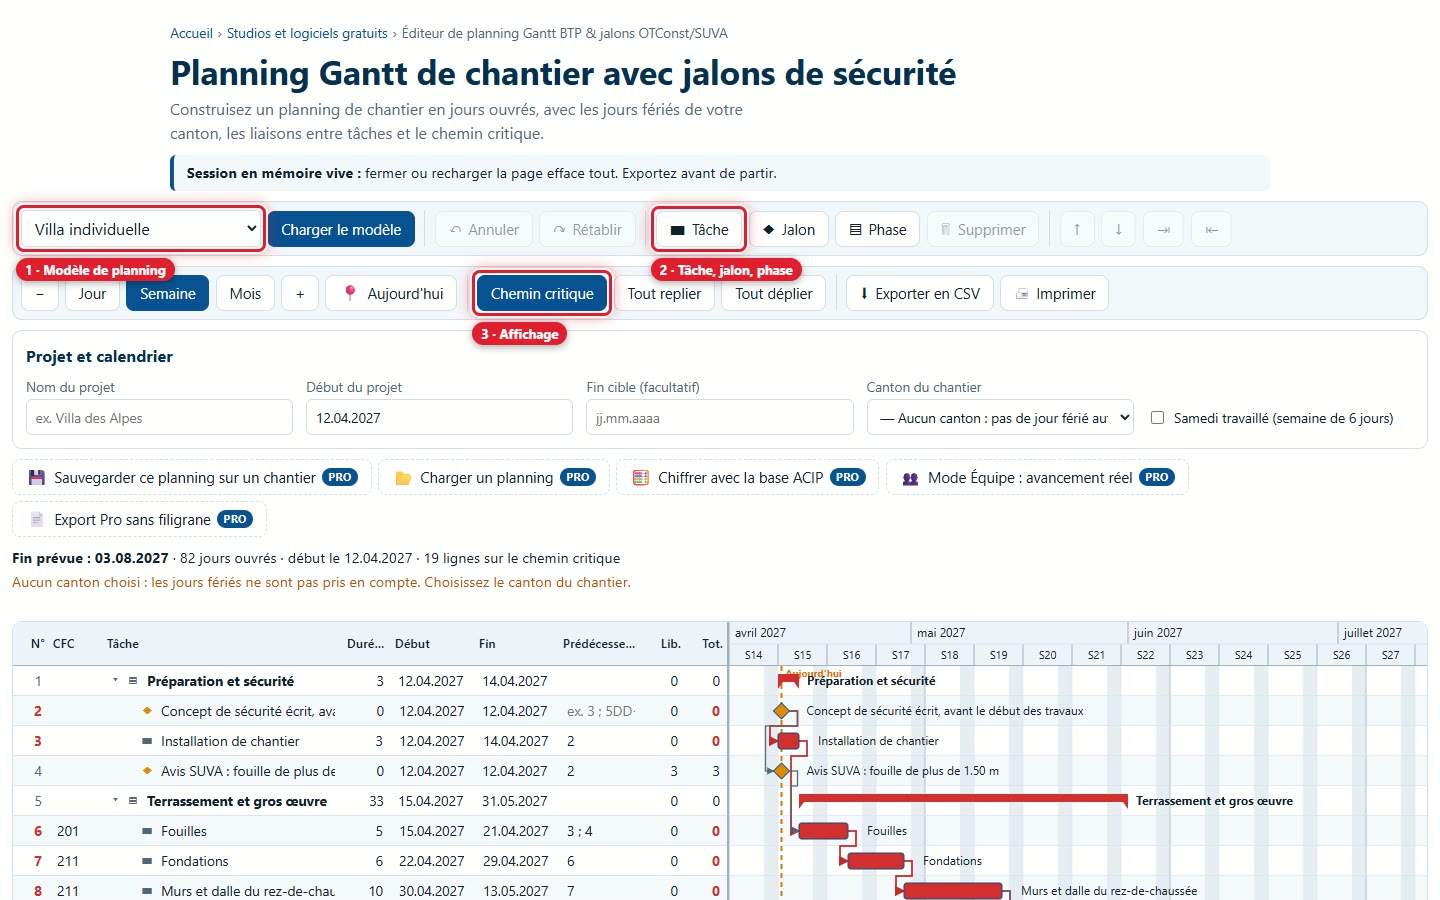
1Opening the studio and choosing a template
The studio opens with a detached house schedule, ready to be adapted. The Schedule template list offers four starting points: Detached house, Small apartment building (G+3), Renovation with asbestos survey and Empty schedule. Load template replaces current rows; Cancel restores them.
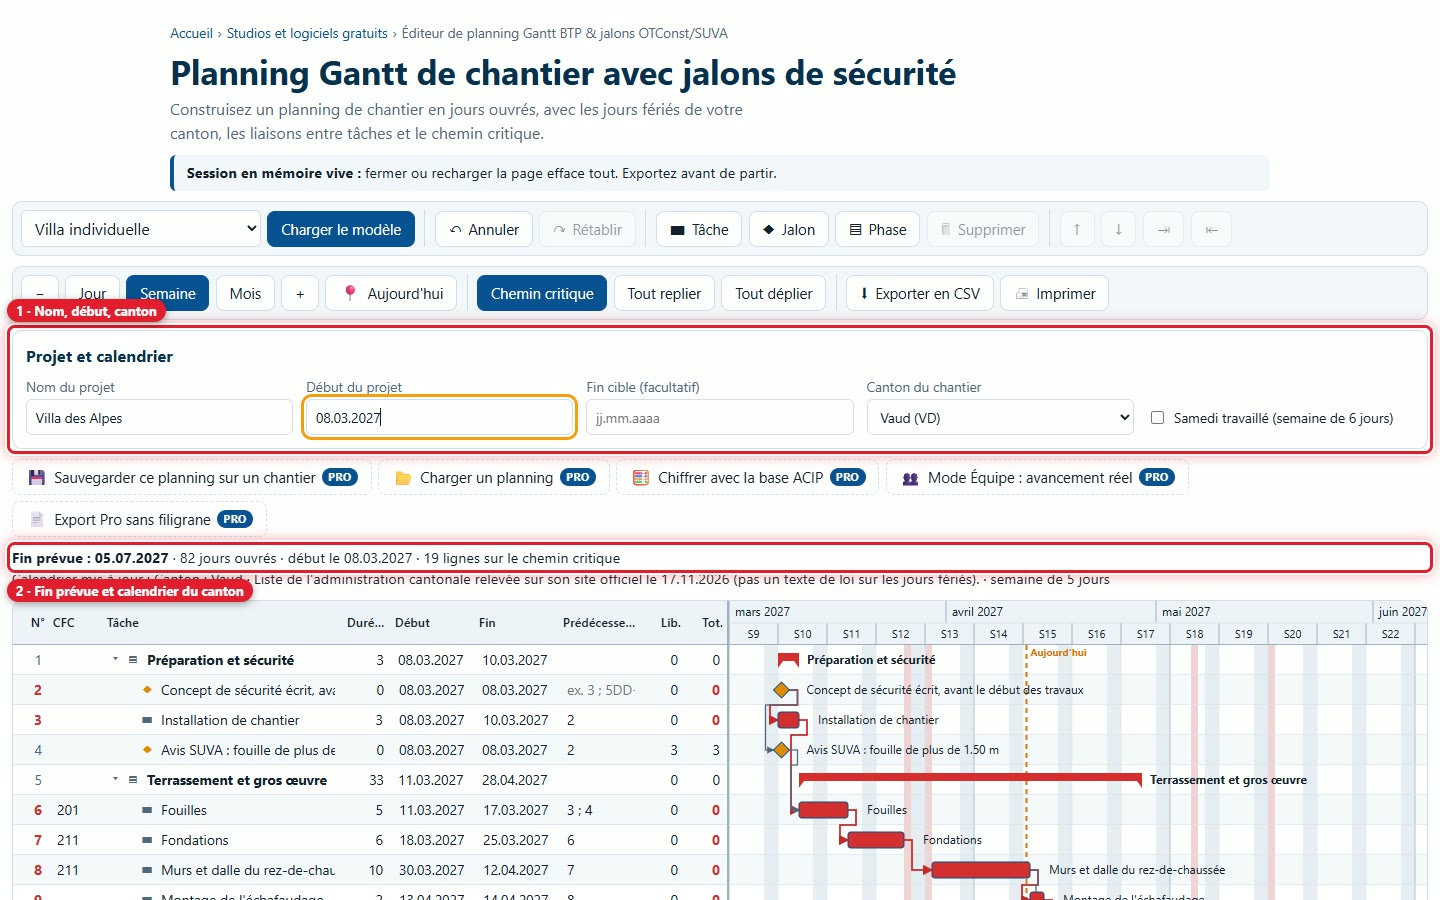
2Entering the project name, start date and canton
In Project and calendar, enter the project name and start date (dd.mm.yyyy), then choose the Construction site canton: public holidays for this canton are taken into account. The summary line shows the expected end date, the number of working days and the number of rows on the critical path. A checkbox allows working on Saturdays (6-day week).
2. Reading and editing the schedule
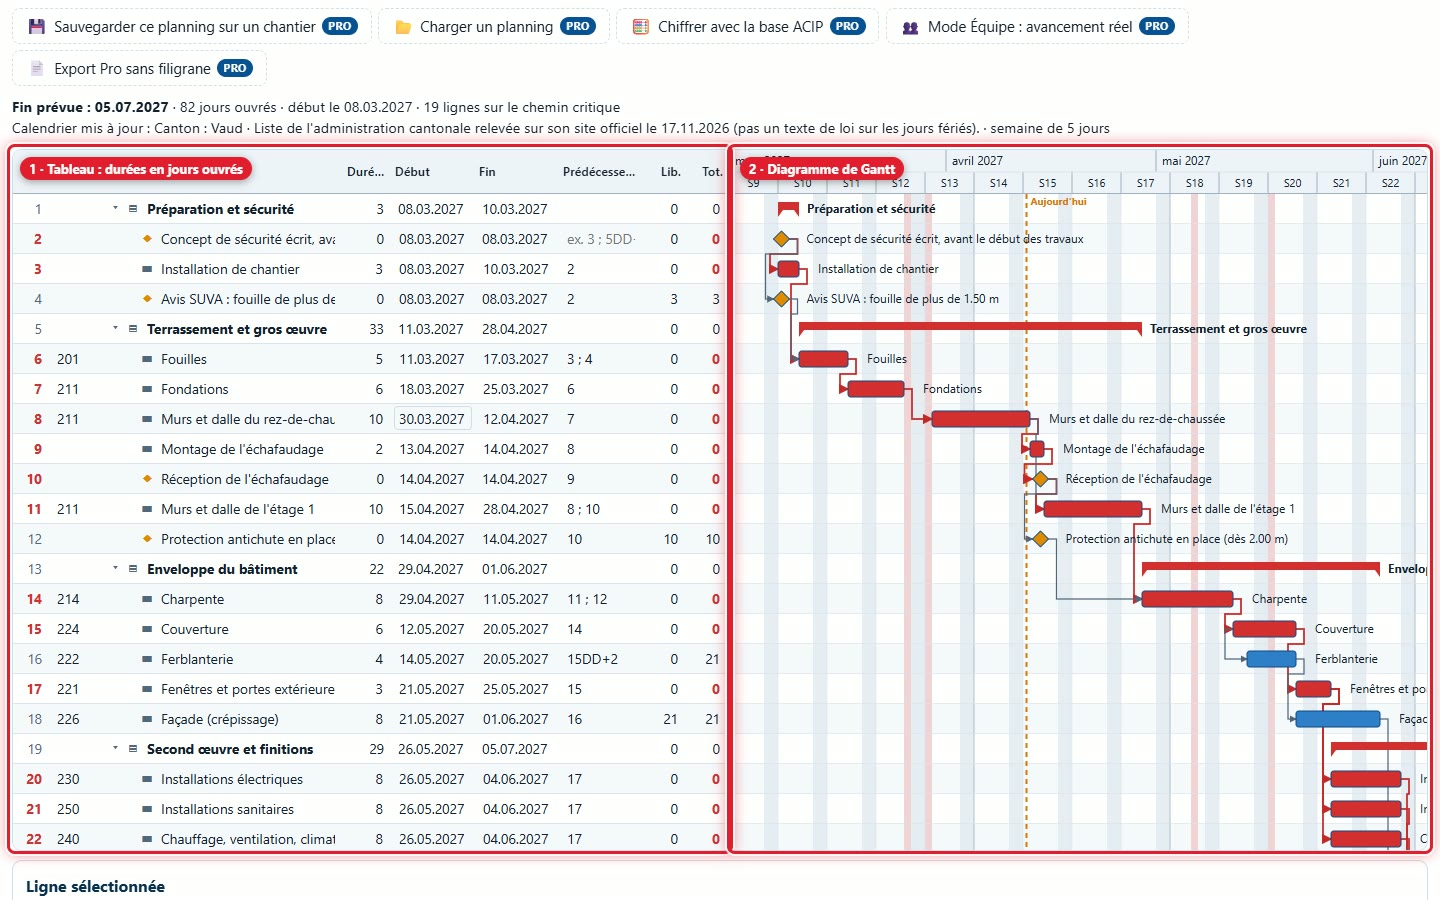
3The table and the chart
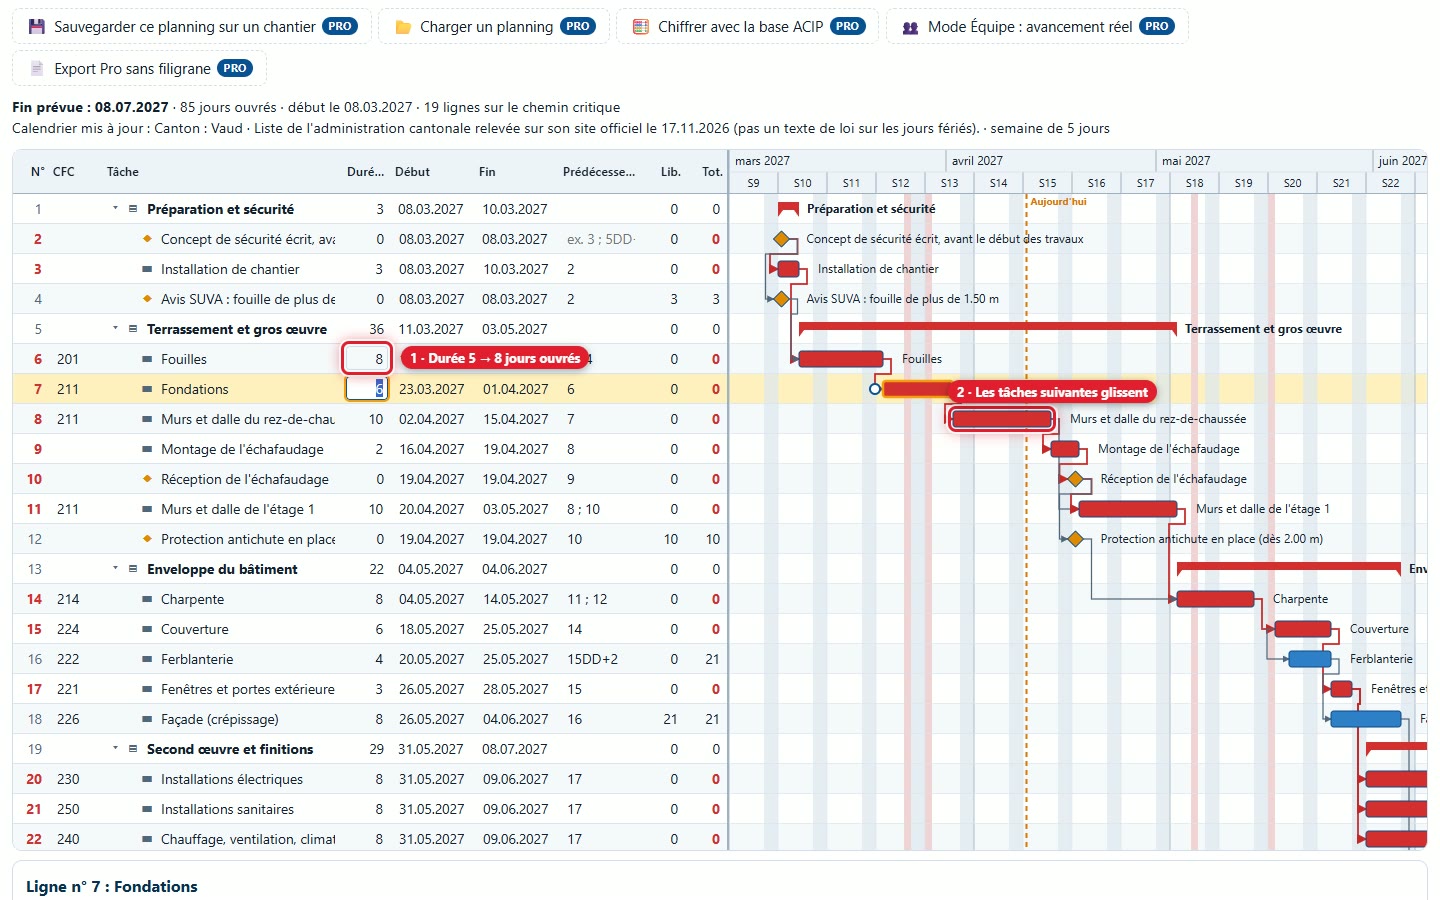
On the left, the row table; on the right, the Gantt chart. A row is a task (a bar), a milestone (a diamond without duration) or a phase (a group of rows, which collapses with the arrow). Weekends and holidays are greyed out in the chart, and an orange line marks today's date.
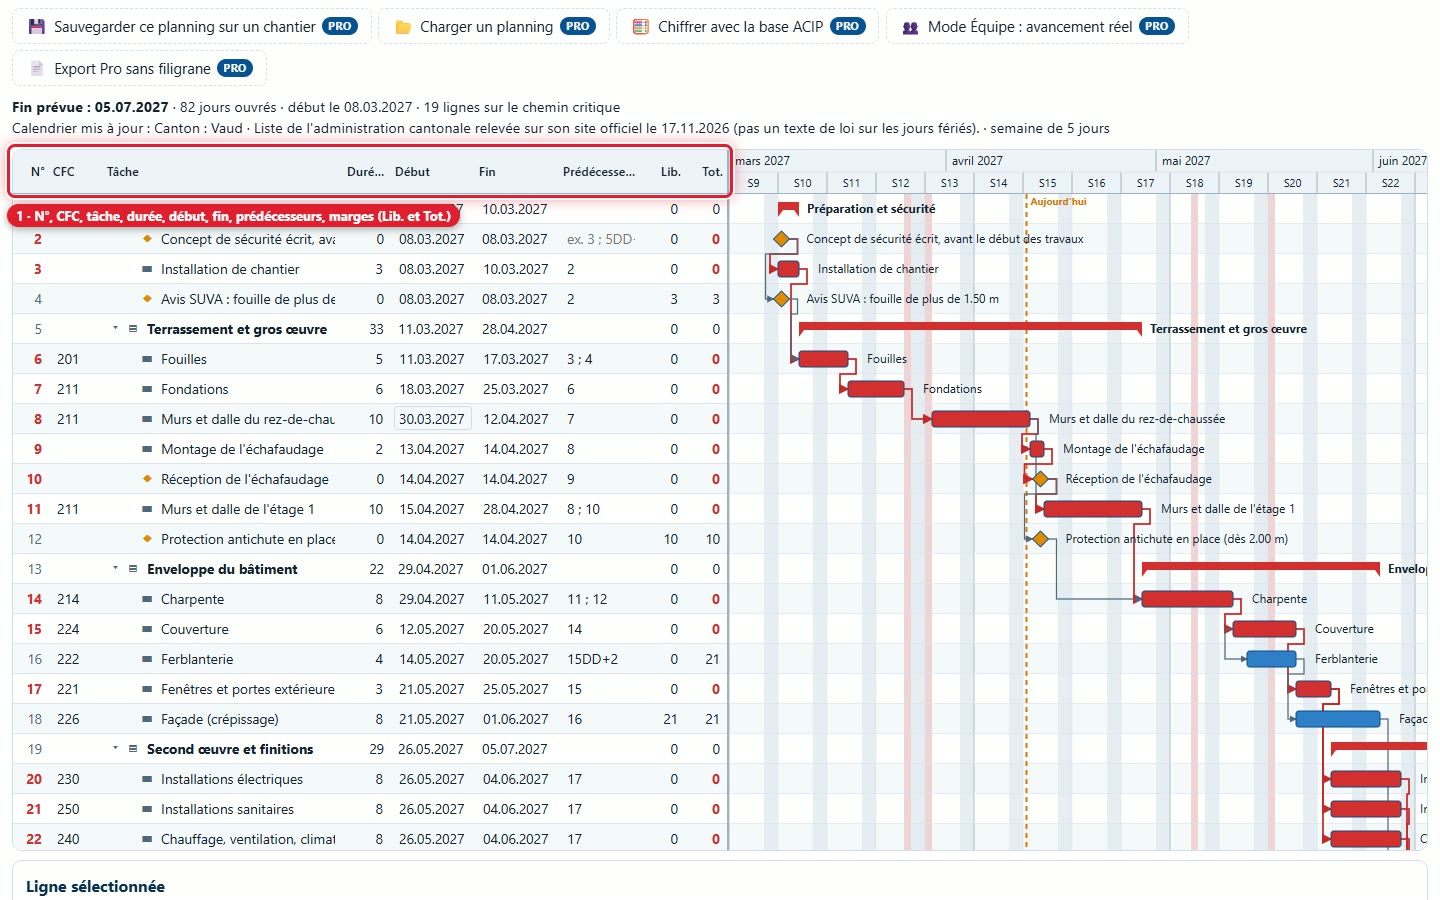
4The table columns
Each row has a number, a CFC code (free text), a name, a duration in working days, a start, an end, predecessors and two floats: Lib. (free float) and Tot. (total float). Values in red are on the critical path.
5Changing a duration
Click the duration cell of a row, enter a number of working days, then validate with Enter. Rows that depend on it shift, and the expected end is recalculated.
6Adding a task, a milestone or a phase
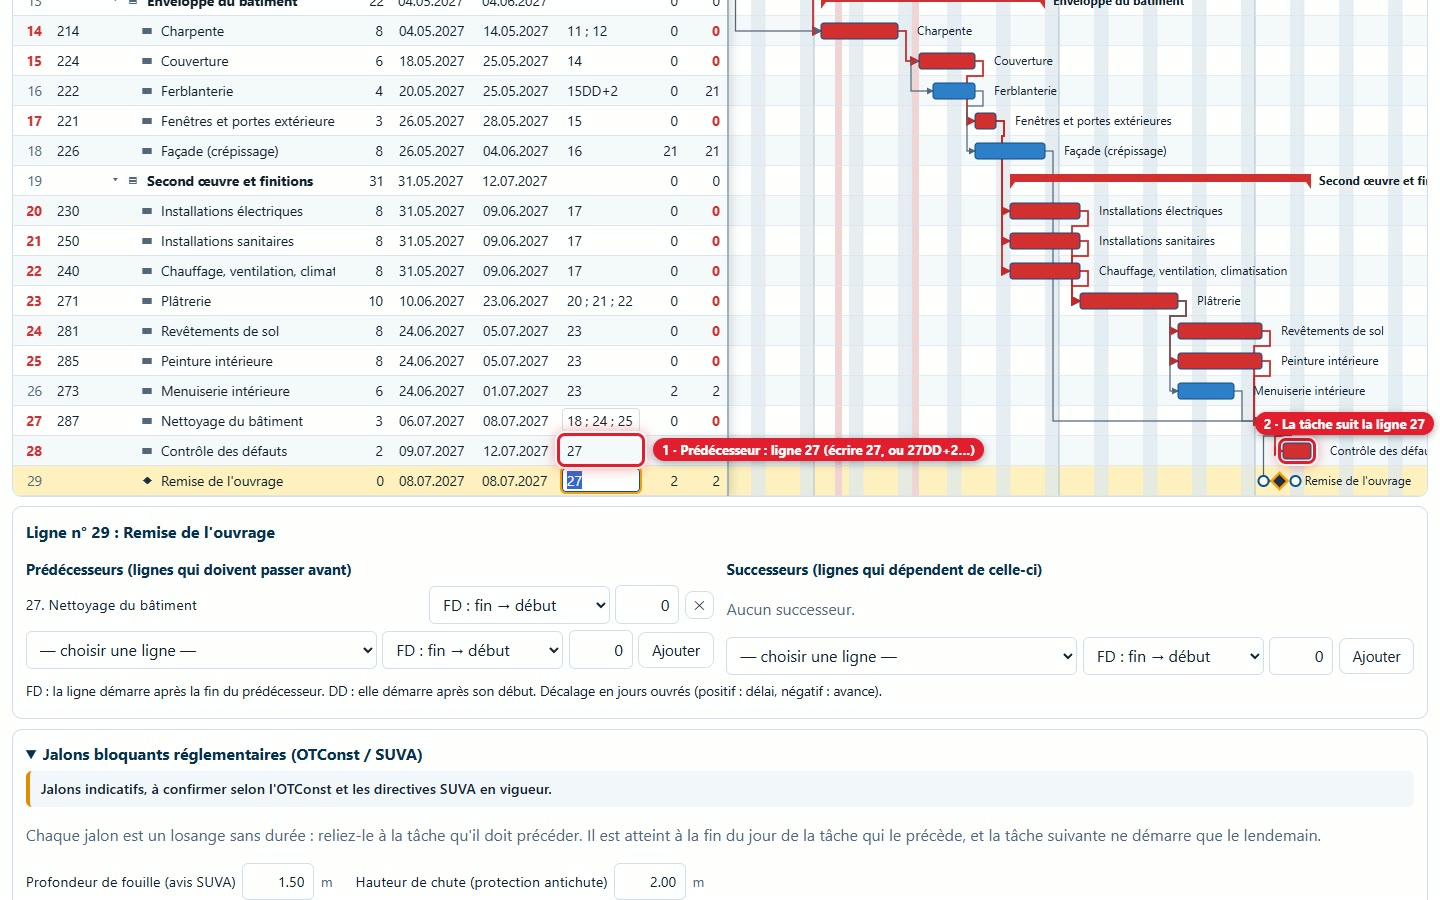
Choose a row, then click Task, Milestone or Phase: the new row is added after the chosen row, and you enter its name. To place it, enter its predecessors in the table: the number of the row that must come before (for example 27) or several numbers separated by semicolons (3; 5FS+2; 7SS-1). The ↑ ↓ buttons move the row, ⇥ ⇤ nest it in a phase or move it out, Delete removes it.
3. Links between rows
7Linking two rows with the mouse
Drag the round point on the right of a bar (end) to another bar: the studio creates an FD link (the row starts after the end of the other). The round point on the left (start) creates a DD link (it starts after the start of the other). The video shows the gesture.
8Viewing and adjusting a row's links
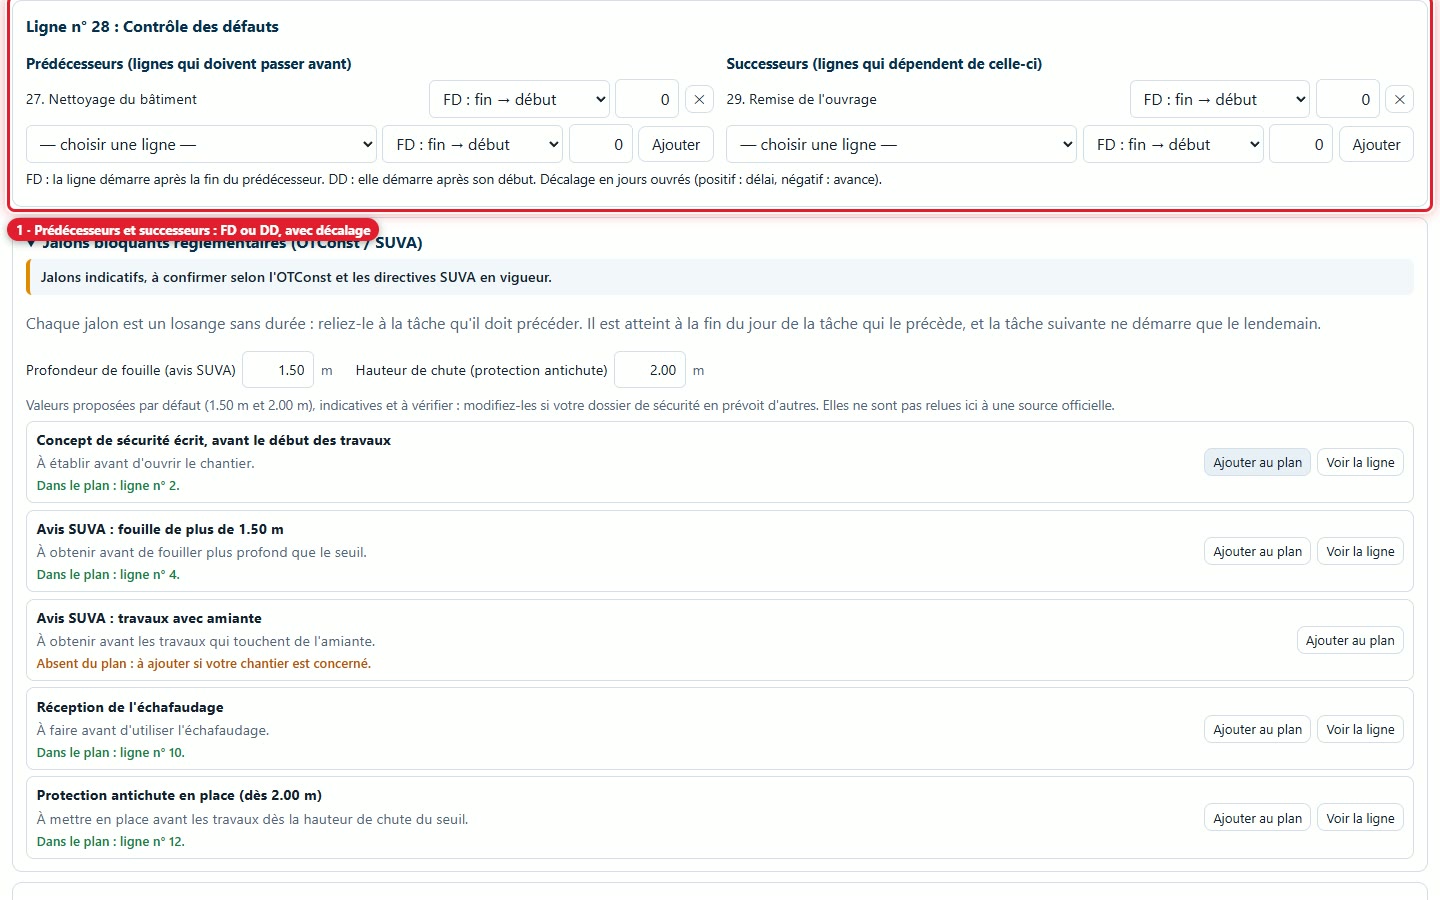
Click a row: the Selected row panel lists its predecessors and successors. For each link, you choose the type (FD or DD) and an offset in working days: positive for a delay, negative for an advance. You can also add or delete a link from this panel.
4. The critical path and float
9Show or hide the critical path
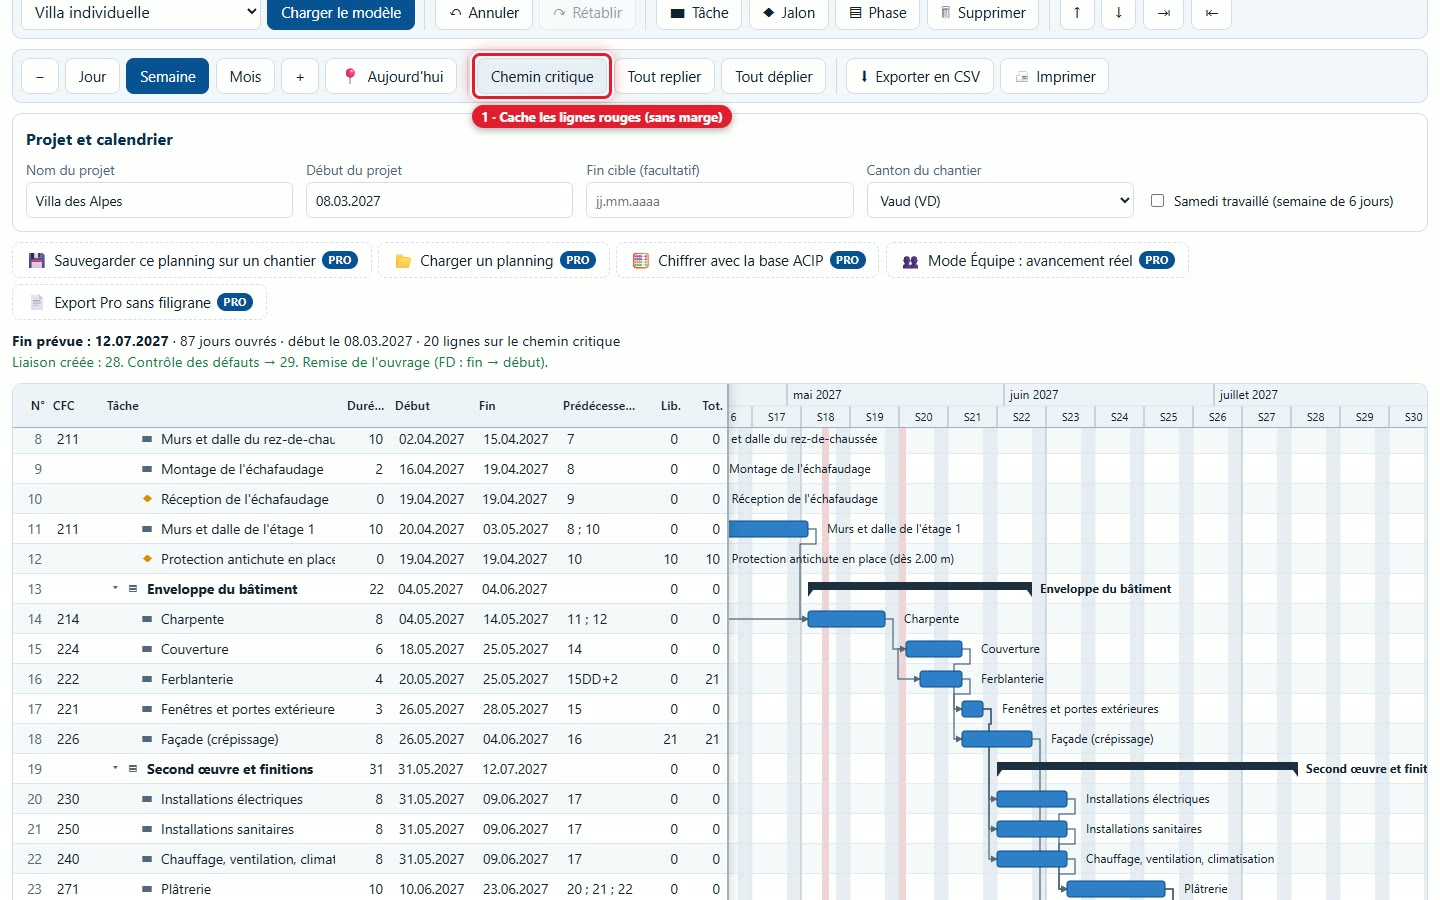
The Critical path button colors in red the rows without float: a delay on them pushes back the end of the project. The other rows have free float (days the row can slip without pushing back another row) and total float (days it can slip without pushing back the end).
5. Safety milestones
10Adding a statutory milestone to the schedule
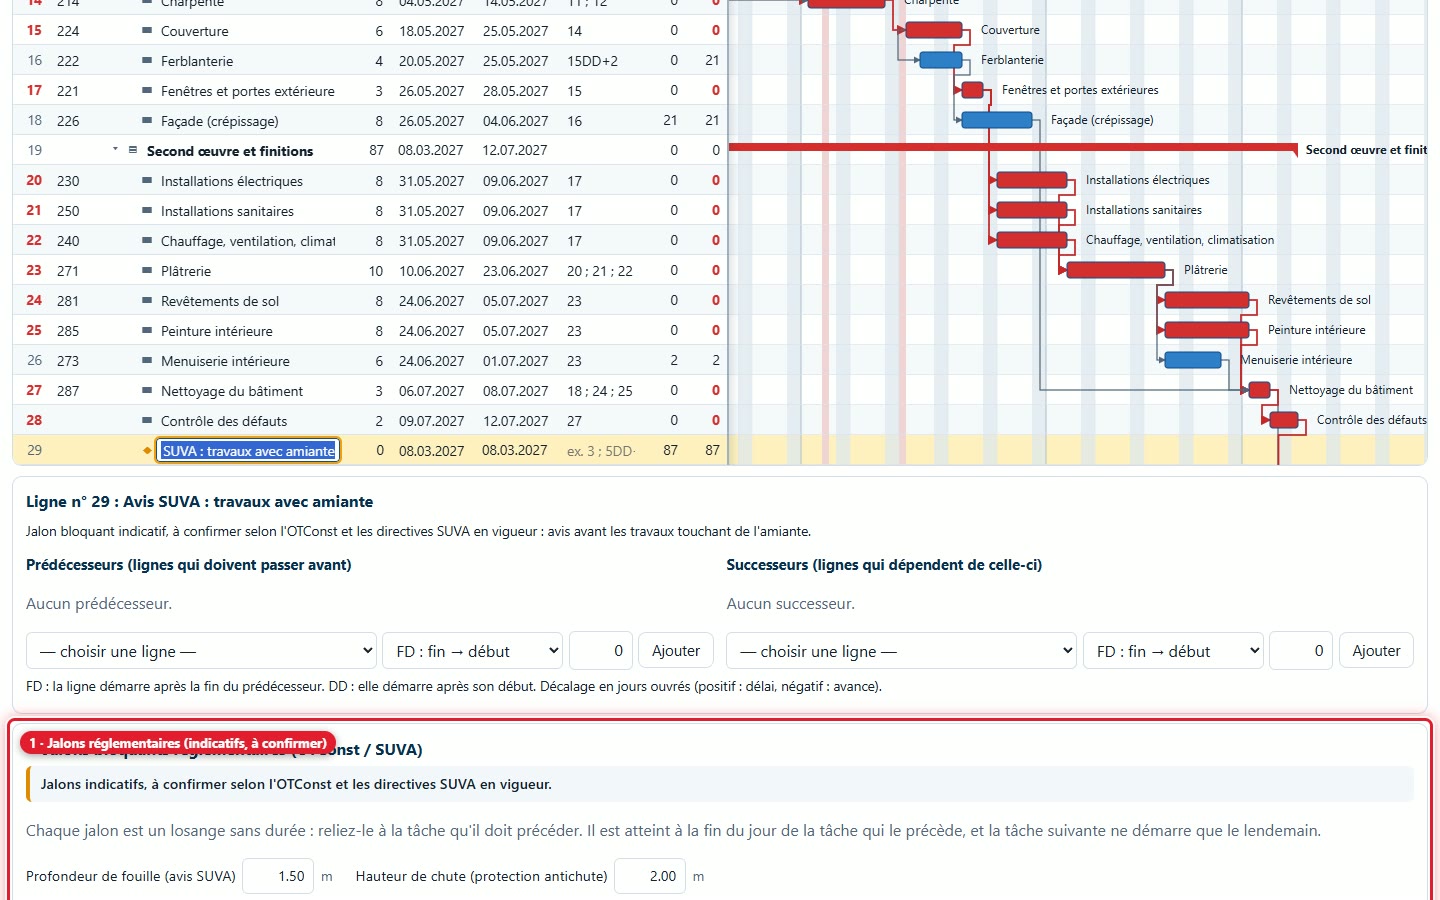
The Statutory blocking milestones (OTConst / SUVA) panel offers five milestones: written safety concept before work starts, SUVA notice for deep excavation, SUVA notice for asbestos work, scaffolding handover, and fall protection in place. For each, the « Add to schedule » button creates a milestone and the « View row » button leads to it. The excavation and fall-height thresholds (1.50 m and 2.00 m initially) can be changed.
6. Public holidays and non-working days
11Cantonal public holidays
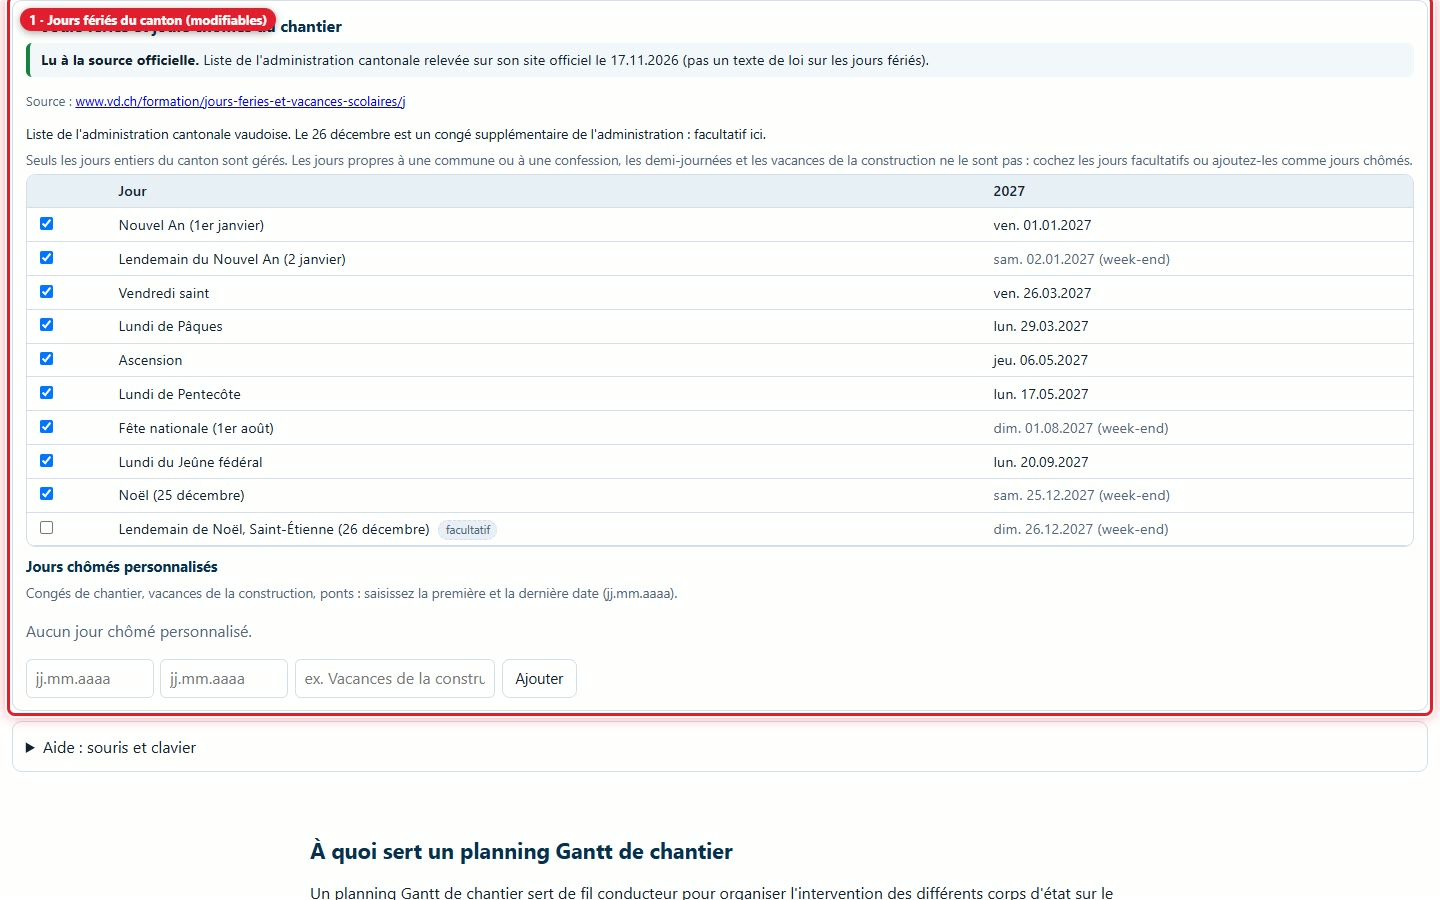
The Construction site public holidays and non-working days panel lists the days of the chosen canton, with their date for each year of the schedule. Each day can be checked or unchecked. The panel also shows whether the list was read from the official source or if it needs to be checked, with the source address and reading date.
12Adding a non-working day
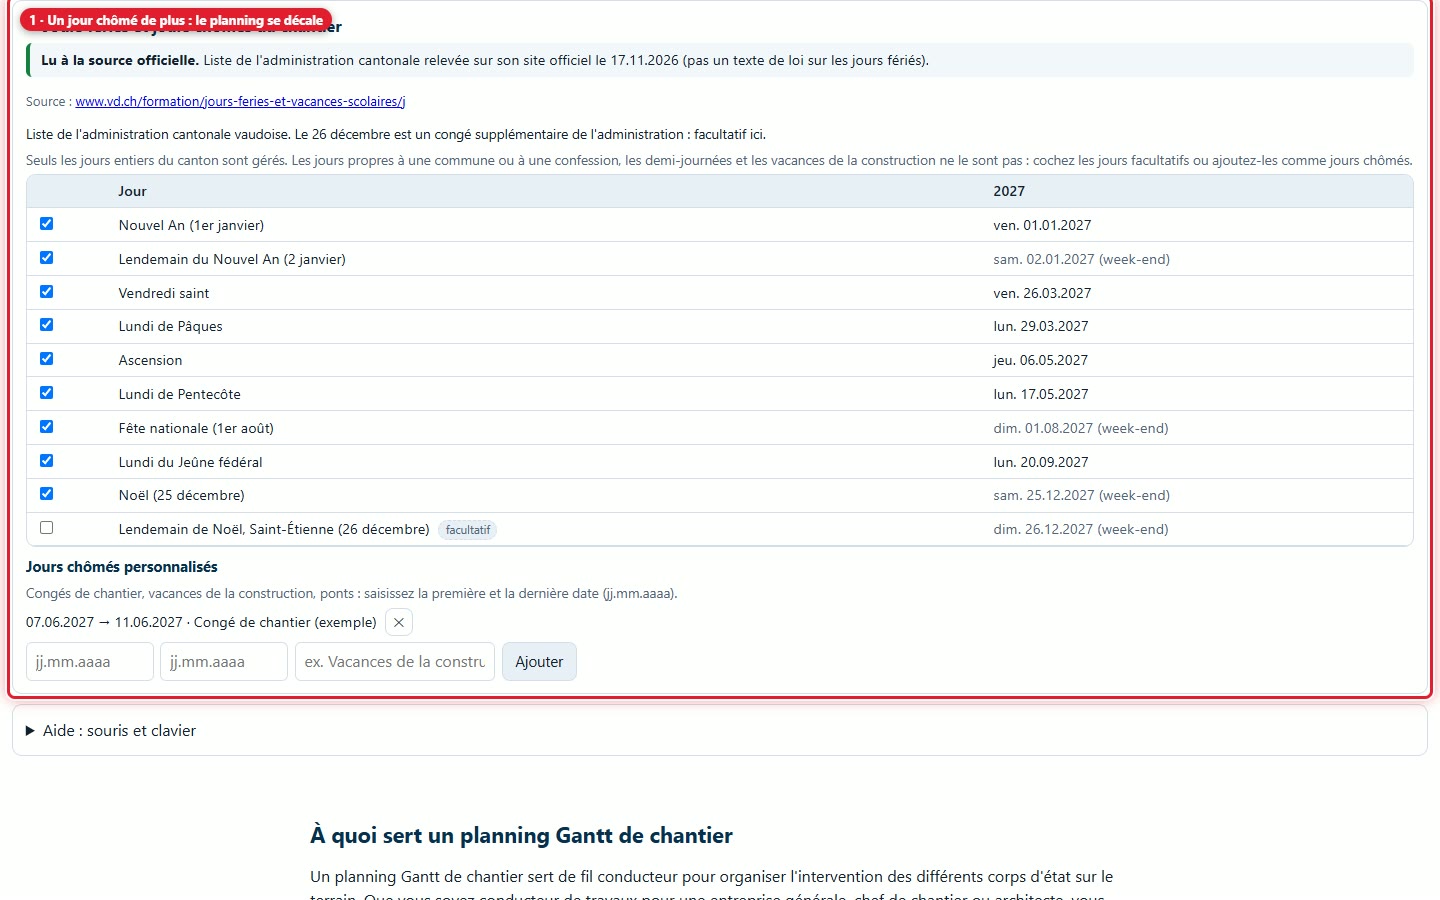
For a construction site leave, construction holidays or a bridge day, enter the first and last date (dd.mm.yyyy) and a label, then click Add. These days are greyed out in the diagram and the end of the schedule shifts.
7. Moving a bar with the mouse
13Drag a bar, pull its handle
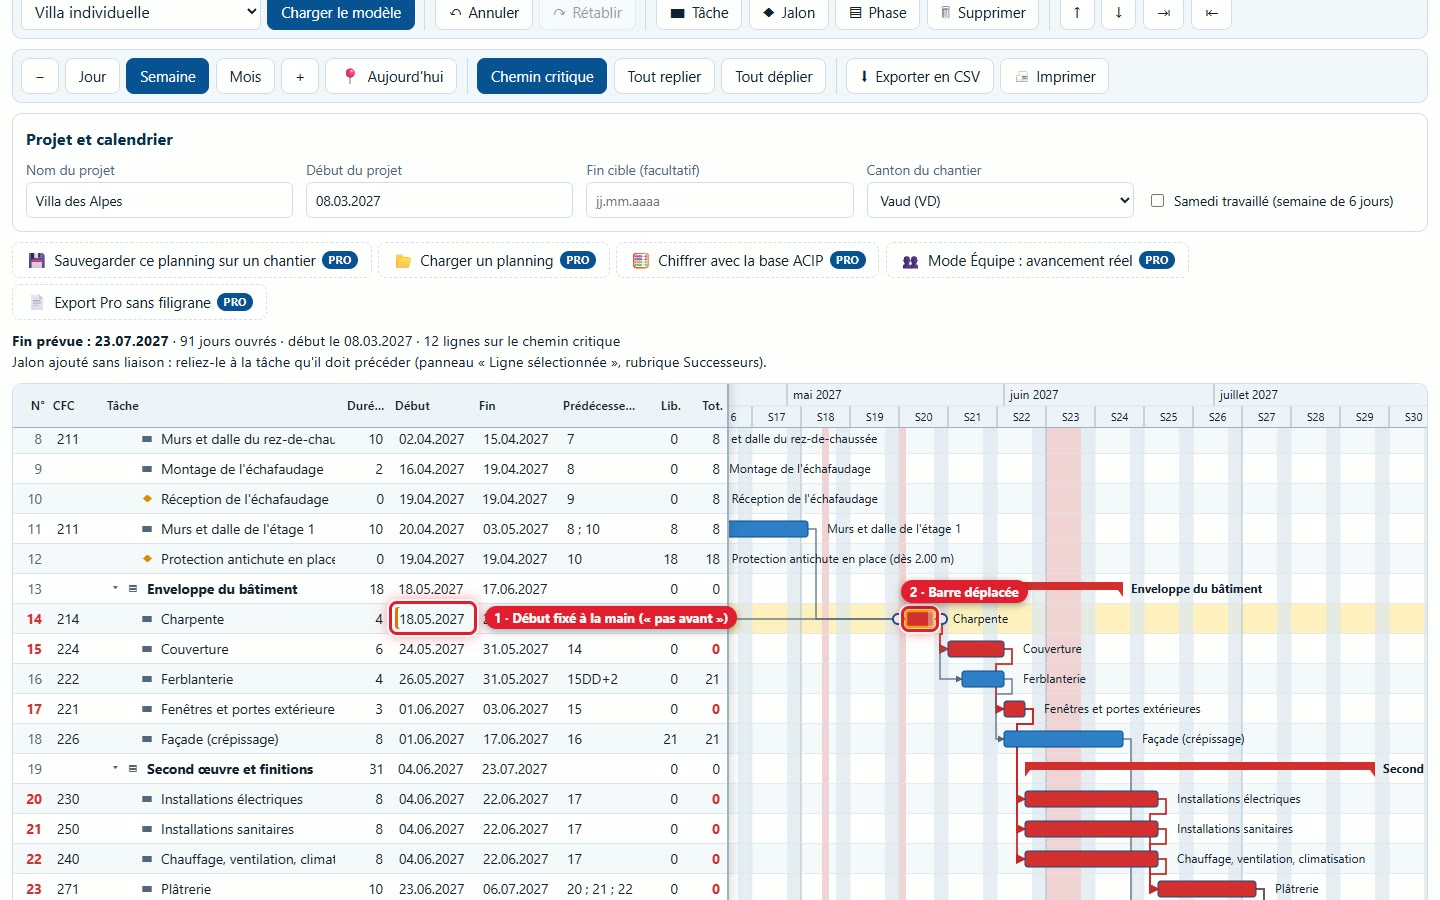
Drag a bar to move it: it cannot pass before its predecessors. Pull the handle at its right end to change its duration. The studio displays the dates during the gesture.
14The fixed « not before » move
After a move, the start date is set manually: the row is highlighted, and the start date tooltip says « Not before … (manually set) ». Clear the start box to return to automatic calculation.
8. Display and target end
15Day, week, month, today
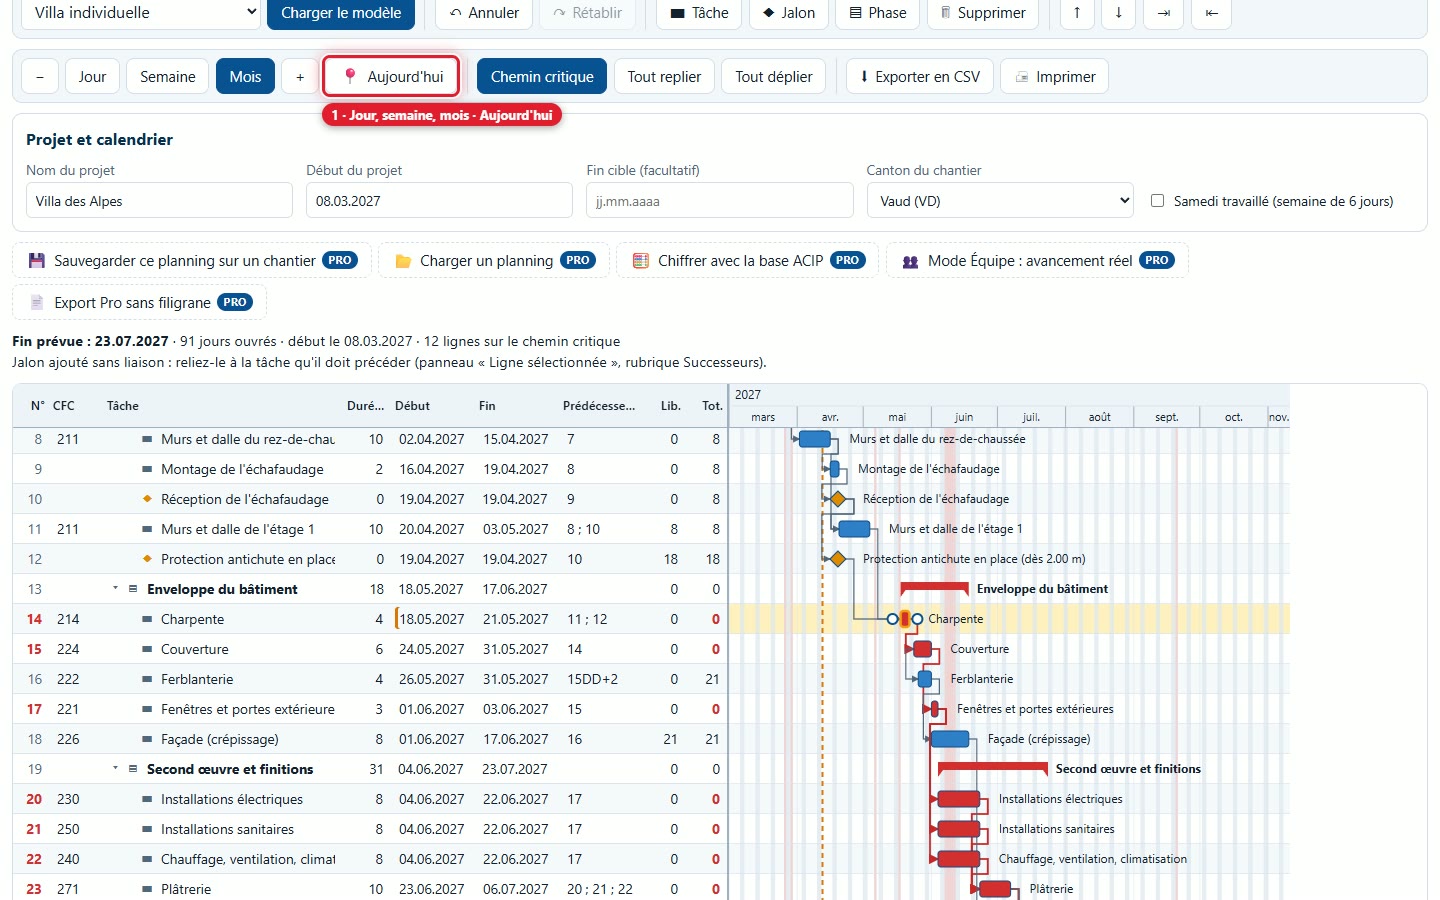
The Day, Week and Month buttons change the scale of the diagram, − and + zoom, Today centers the diagram on today's date, Collapse all and Expand all close or open all phases. On a screen less than 900 px wide, the table and diagram are viewed in two tabs.
16Comparing to a target end
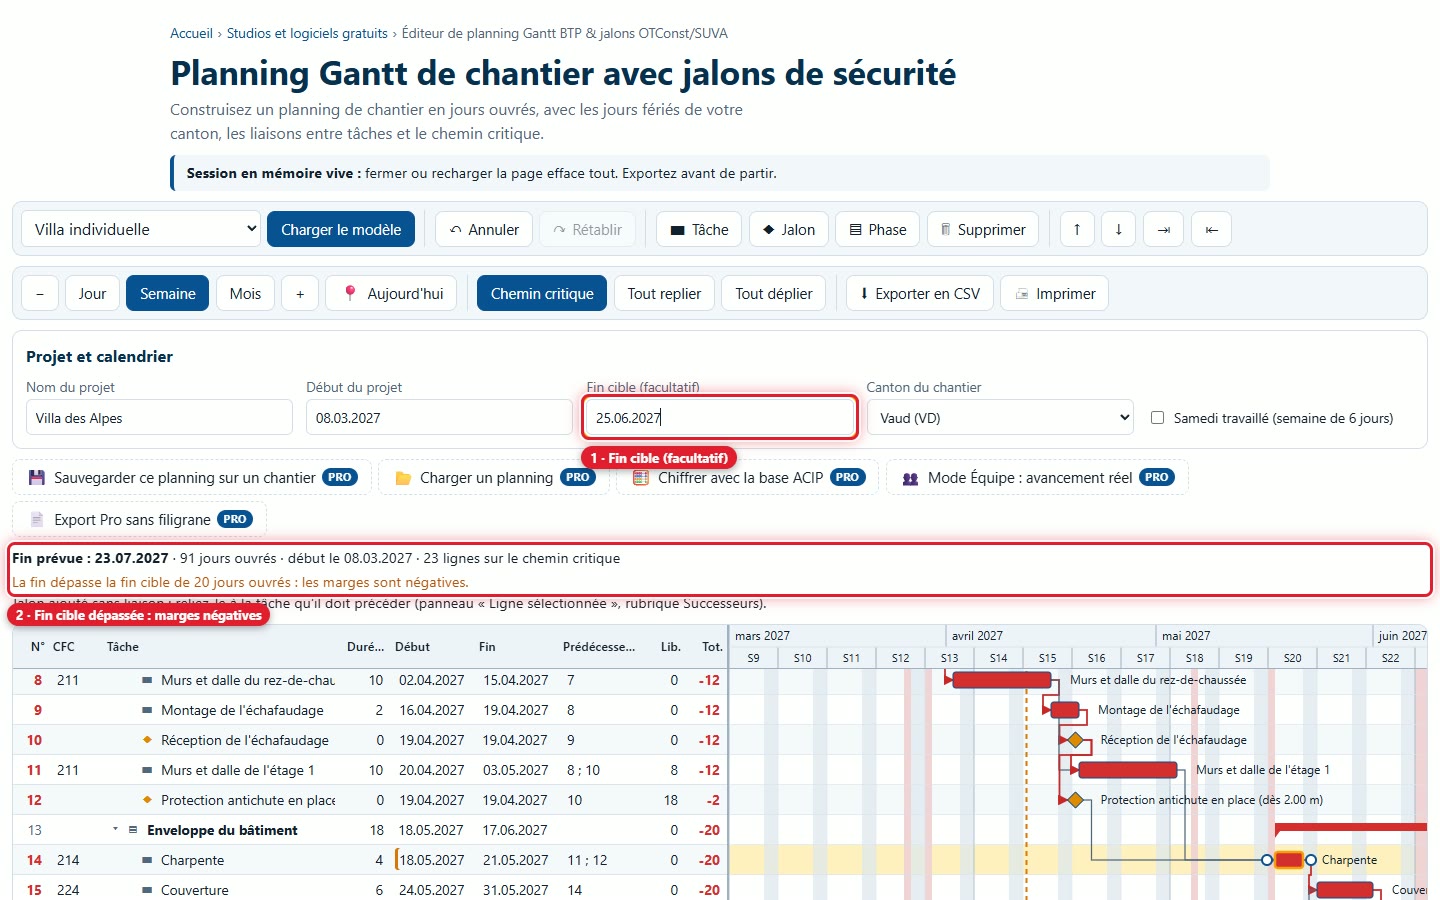
Enter a date in Target end (optional). If the schedule exceeds it, the summary states it in working days and the float becomes negative; if it is met, the summary indicates the remaining float.
9. Exporting and printing
17Export to CSV
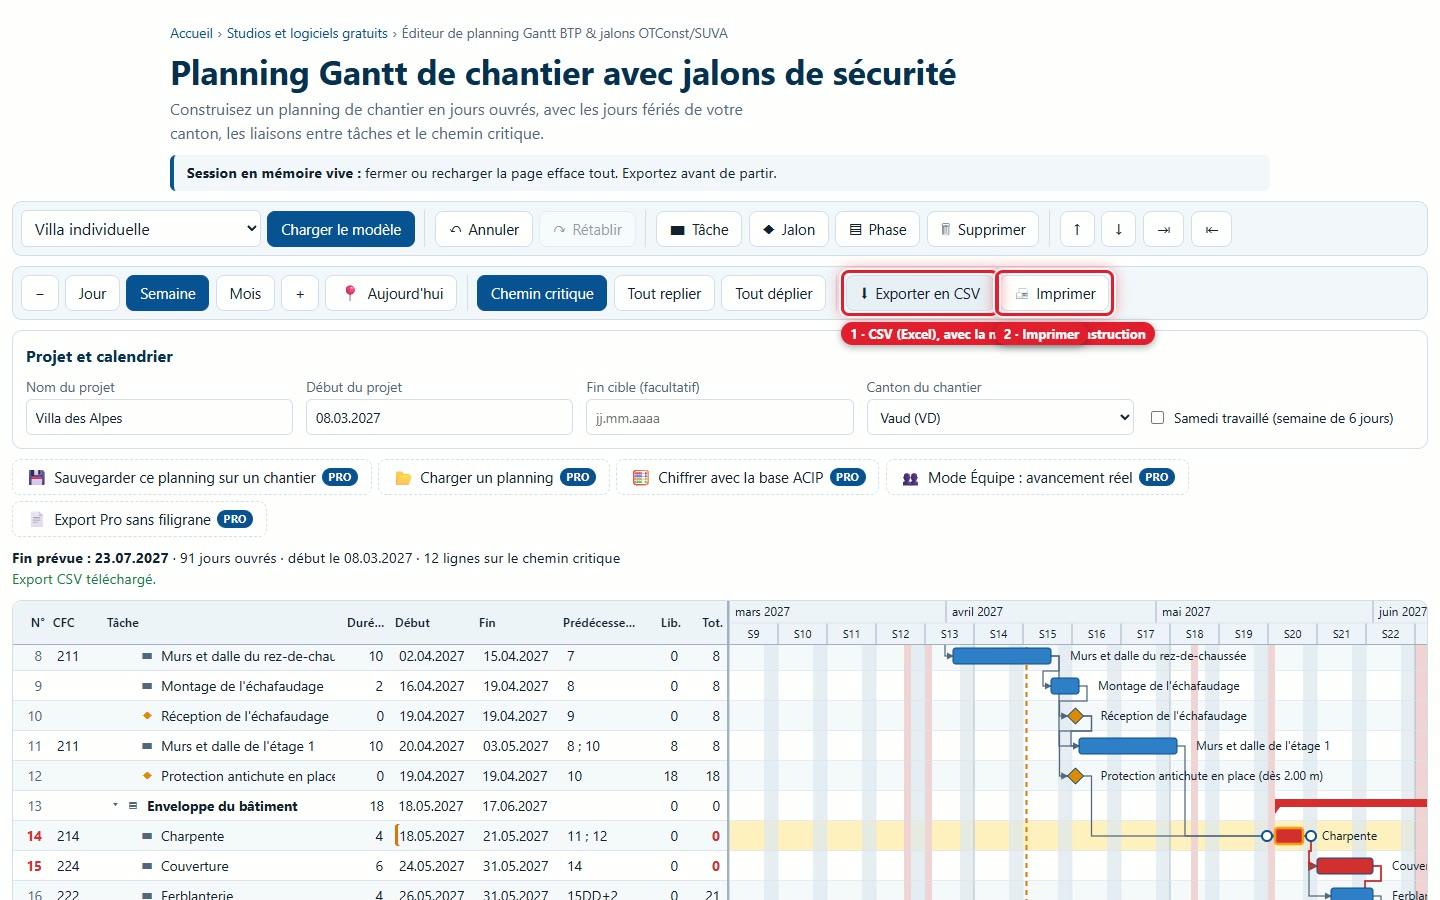
Export to CSV downloads the schedule (semicolon separator, openable in Excel) with the notice "Art Construction — free version" at the top and bottom.
18Print
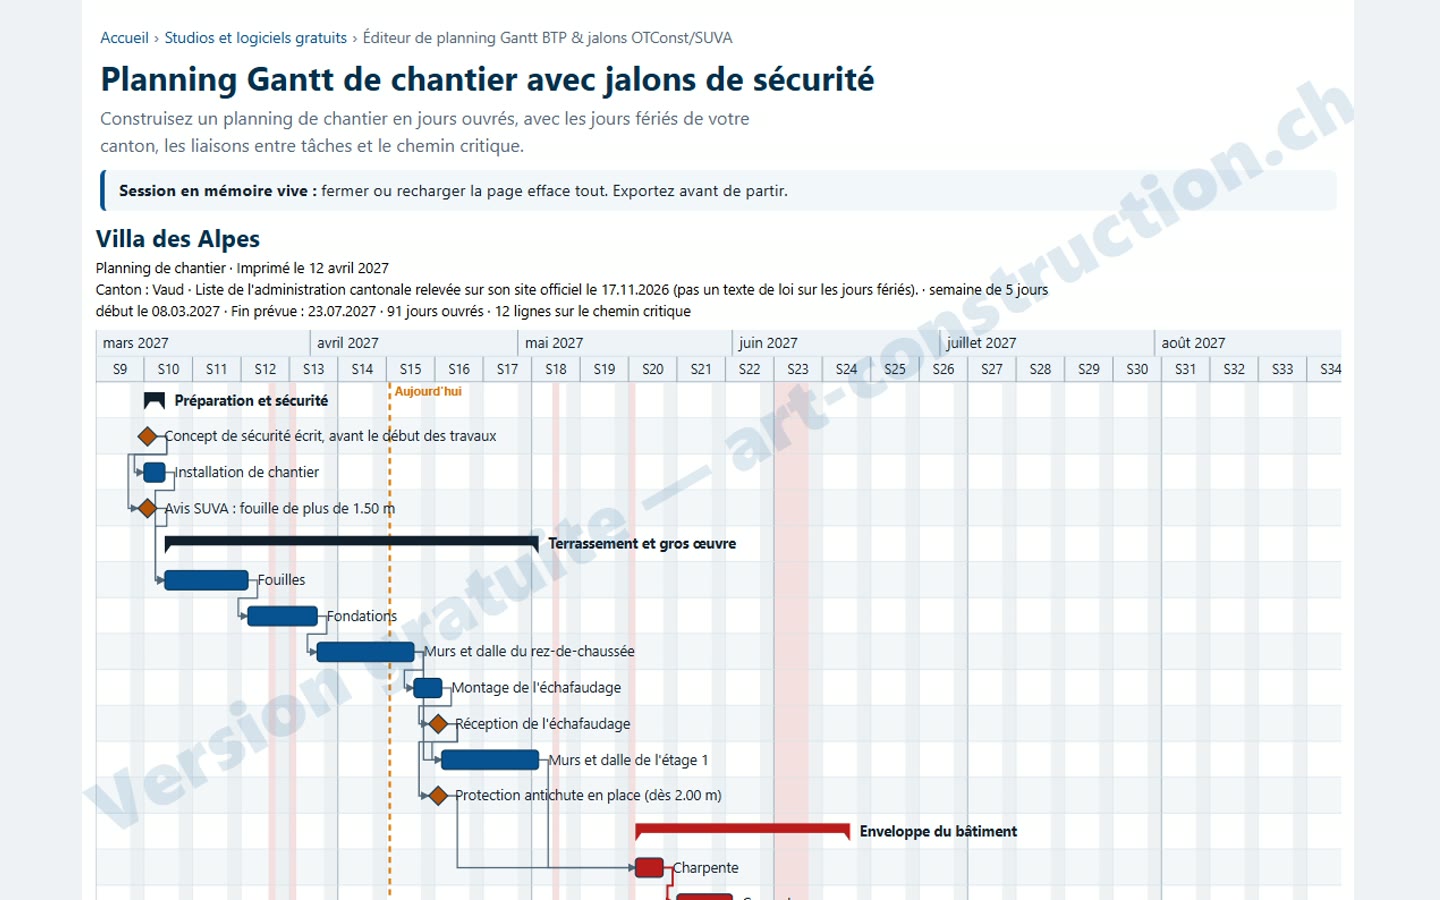
Print prepares a dedicated sheet: project name, print date, cantonal calendar, diagram, color legend and list of regulatory milestones, with a watermark in the free version. To obtain a PDF, choose "Save as PDF" in the browser print window.
10. Using the keyboard
19The help panel
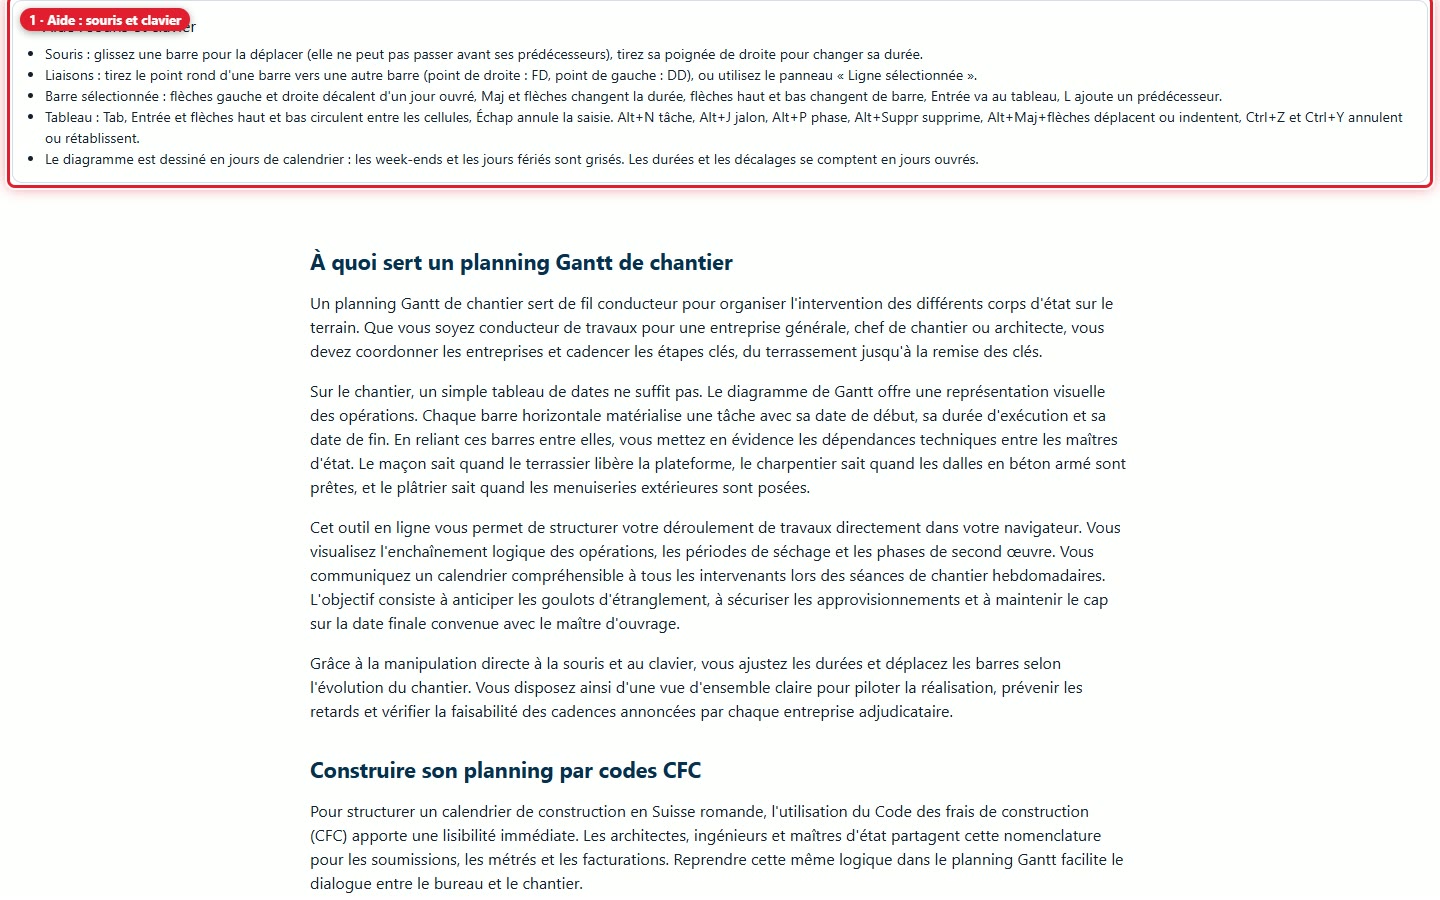
The Help: mouse and keyboard panel summarizes the gestures. In the table: Tab, Enter and the up and down arrows move from one cell to another, Esc cancels entry, Alt+N adds a task, Alt+J a milestone, Alt+P a phase, Ctrl+Z and Ctrl+Y undo and redo. On a bar: the left and right arrows shift it by one working day, Shift and the arrows change its duration, L adds a predecessor.
11. What the Pro version adds
20The five Pro buttons
Five PRO buttons are visible in the free version and open an invitation window: save the schedule to a construction site, load a schedule, estimate with the ACIP database, Team Mode and export without watermark.
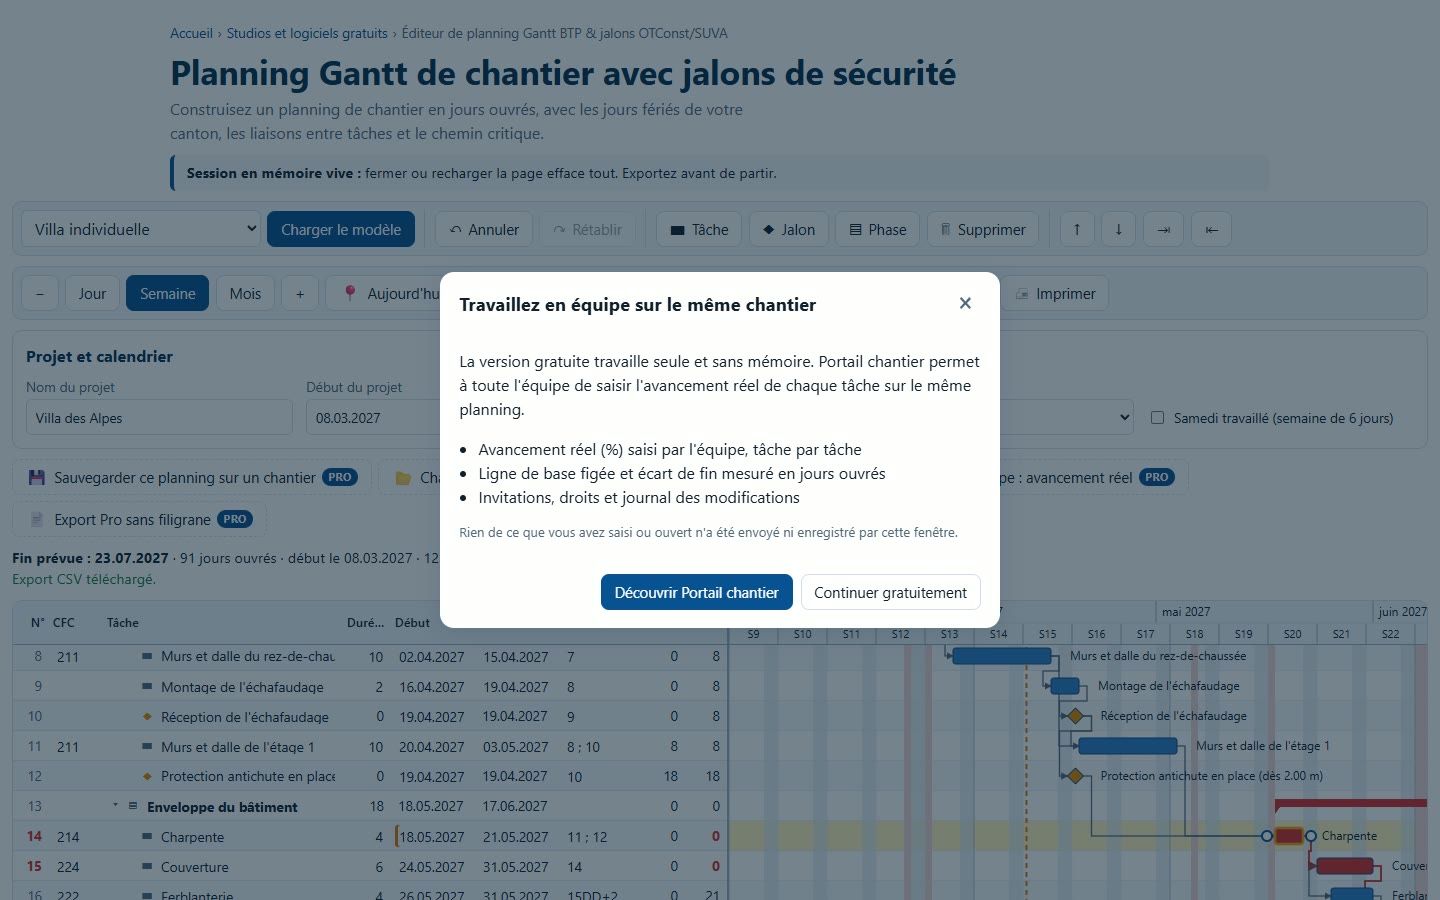
- actual progress in % entered task by task, with the frozen baseline and end variance measured in working days;
- archiving of the schedule construction site by construction site, with its versions, in the Portal;
- Team Mode: the whole team enters progress on the same schedule;
- export without watermark, in company colors.
12. Another template: renovation
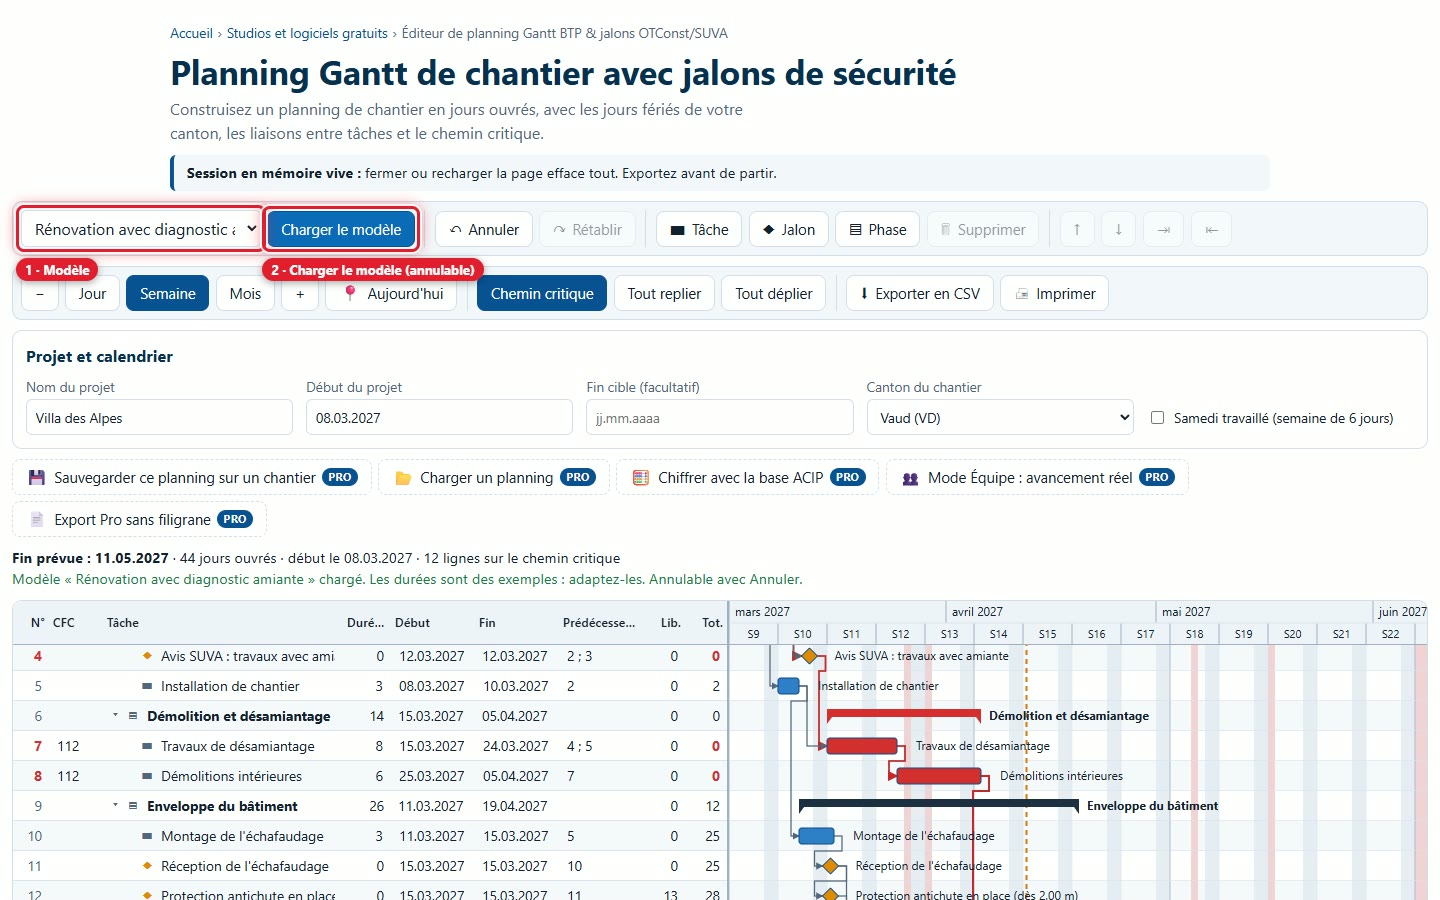
21Load the Renovation template with asbestos survey
Choose the template from the list then click Load template: the schedule shows surveys, demolition and asbestos removal, with the SUVA notice milestone for work involving asbestos. Cancel restores the previous schedule.
13. What this software does not do
- It does not replace a safety dossier: milestones are indicative, to be confirmed according to OTConst and current SUVA directives, and their thresholds are not read from an official source.
- Template durations are examples, not trade references.
- All deadlines are in working days: there is no calendar in calendar days (concrete curing, for example).
- It does not manage days specific to a municipality or denomination, half-days or construction holidays: add them as non-working days.
- Public holiday lists for certain cantons must be verified: the panel indicates this.
- It assigns neither workers nor costs to tasks.
- It saves nothing in the free version and contacts no server; actual progress and baseline are reserved for the Pro version.
A question? Send a request to support.