Construction Site Installation Plan Guide
This studio draws a construction site installation plan to scale in your browser: you import a plan or screenshot, set the scale, and place cranes, skips, site welfare facilities and fences at their actual size. The guide goes from the simplest to the most advanced.
1. Getting started
1Opening the studio
The studio opens on a blank sheet, already to scale: objects are drawn in metres. On the left, the construction site object library; on the right, alerts, properties, legend and layers. The Open background button imports a plan.
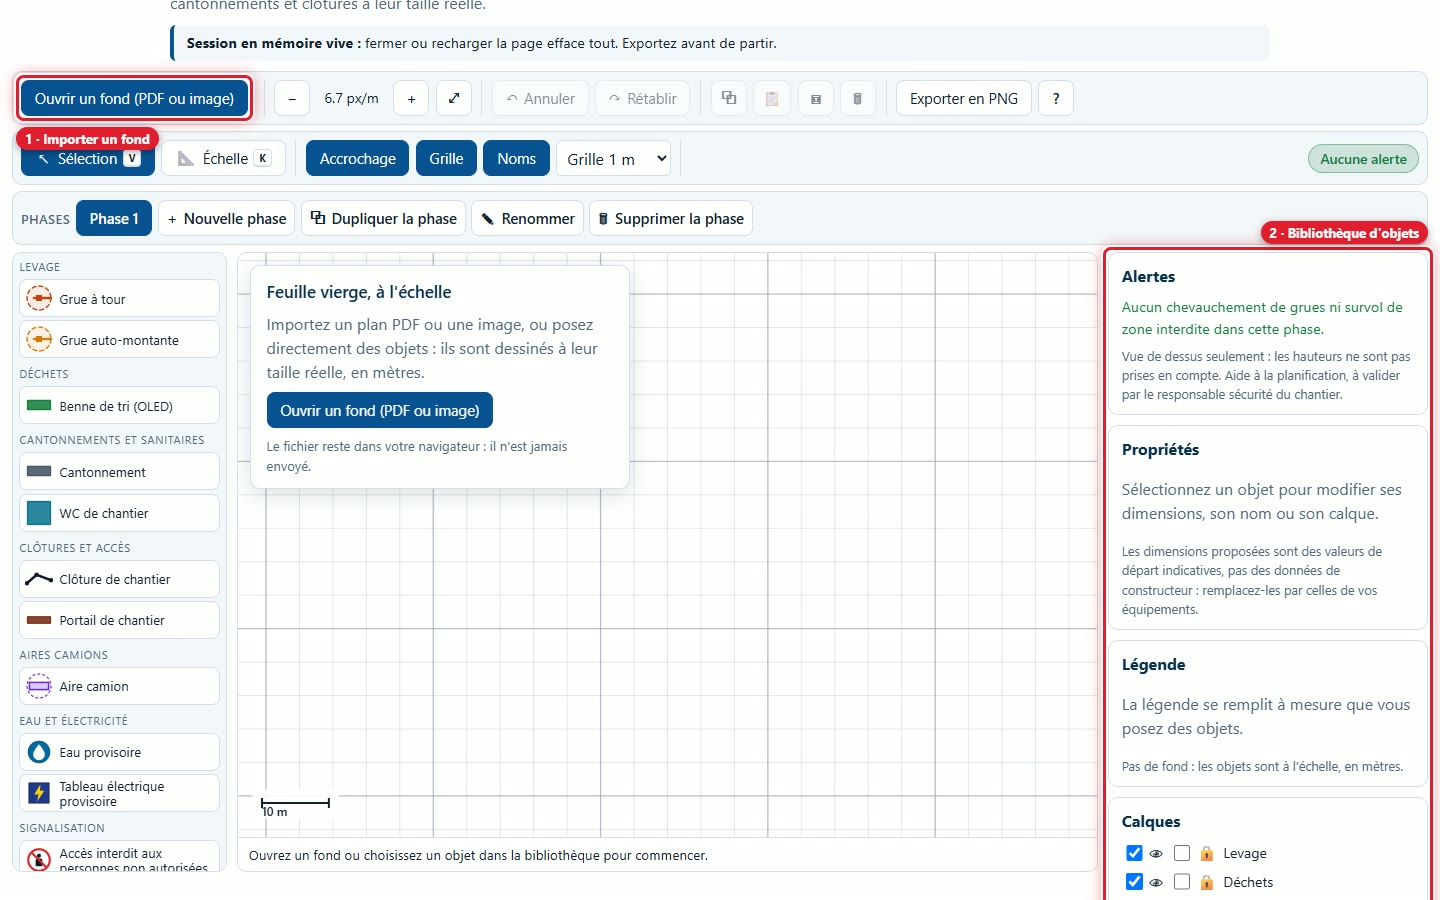
2Importing a background (PDF or image)
Click on Open background and choose a PDF or an image (PNG, JPEG, WebP), for example a swisstopo capture. The file is read in your browser and is never sent. For a PDF, you choose the page; if the PDF is password-protected, the studio asks for the password. The plan also works without a background.
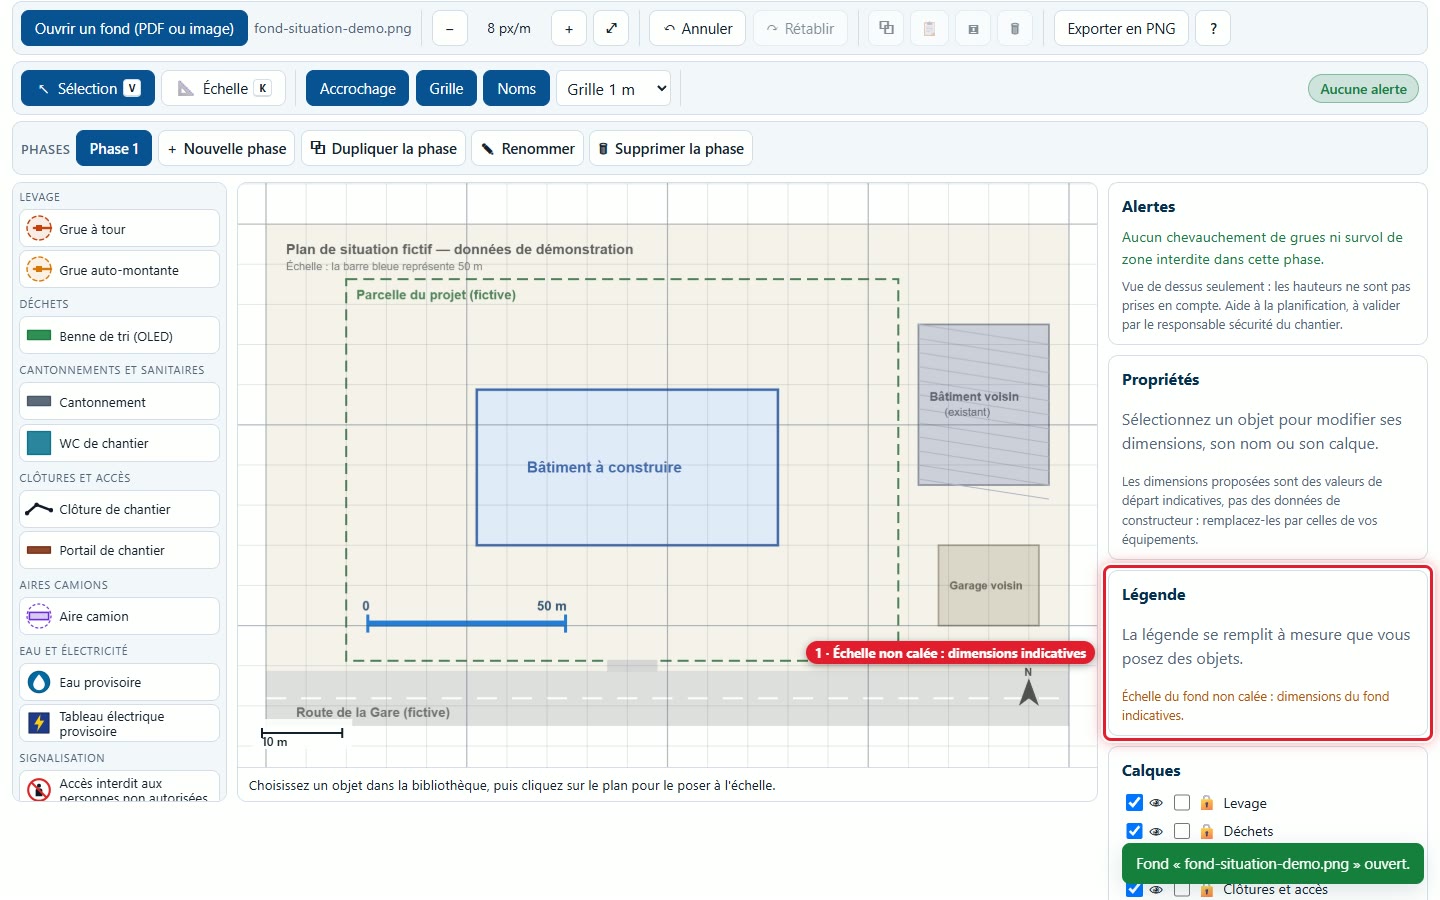
2. Setting the scale
3Choosing two points of a known dimension
As long as the background is not set, the studio indicates it: "indicative dimensions". Click the Scale tool, then on the two ends of a known dimension on the background (here the "50 m" bar). A window asks for the actual distance between these two points, in metres.
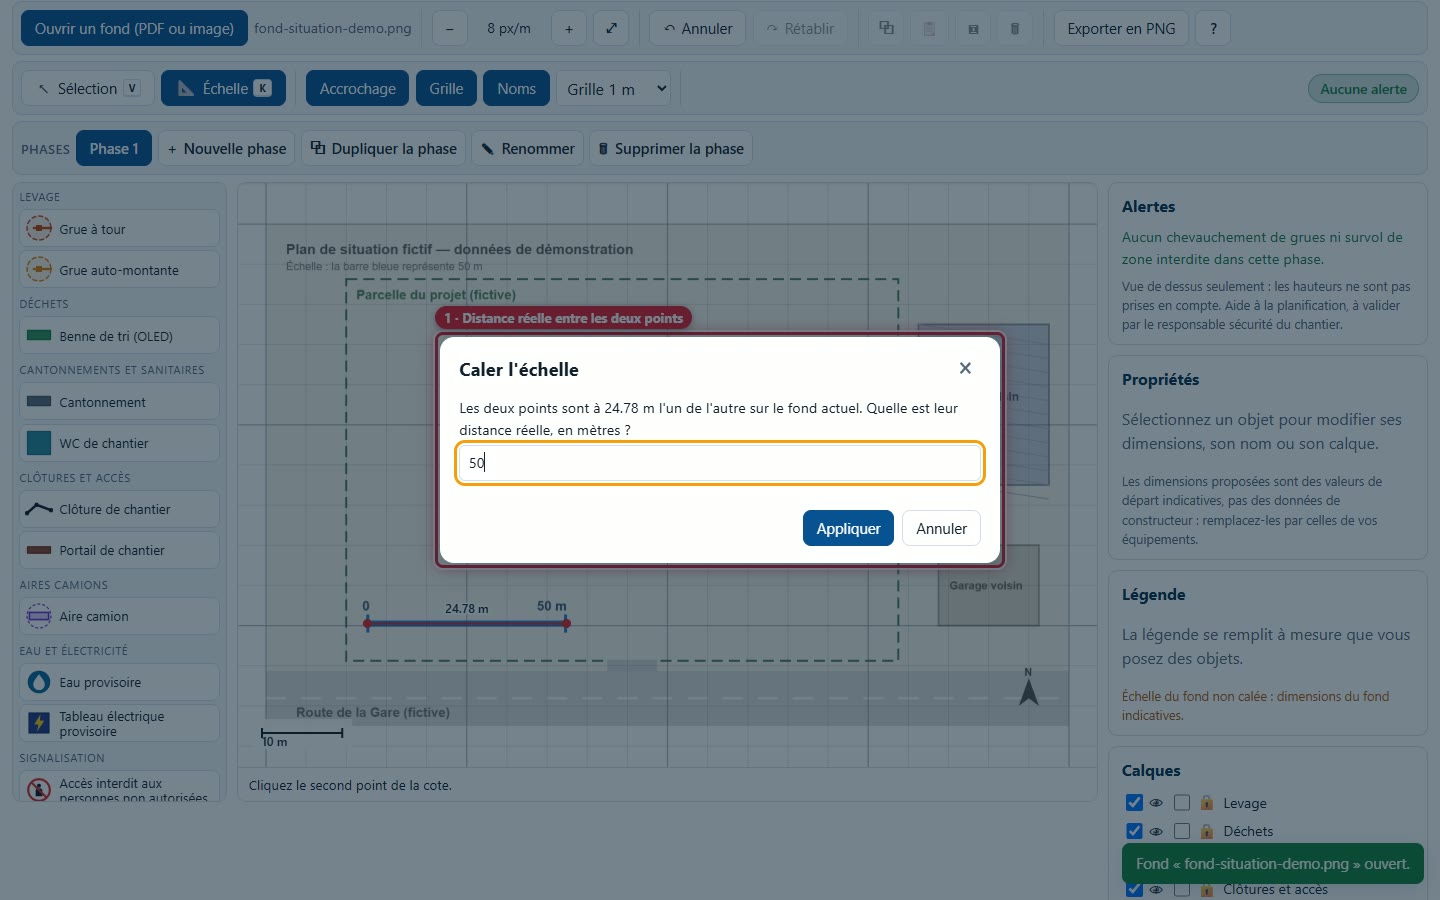
4Confirming the distance
Enter the distance then click Apply (or Enter). The background is scaled around the first point; objects already placed do not move. The legend indicates "Background scale set to a known dimension".
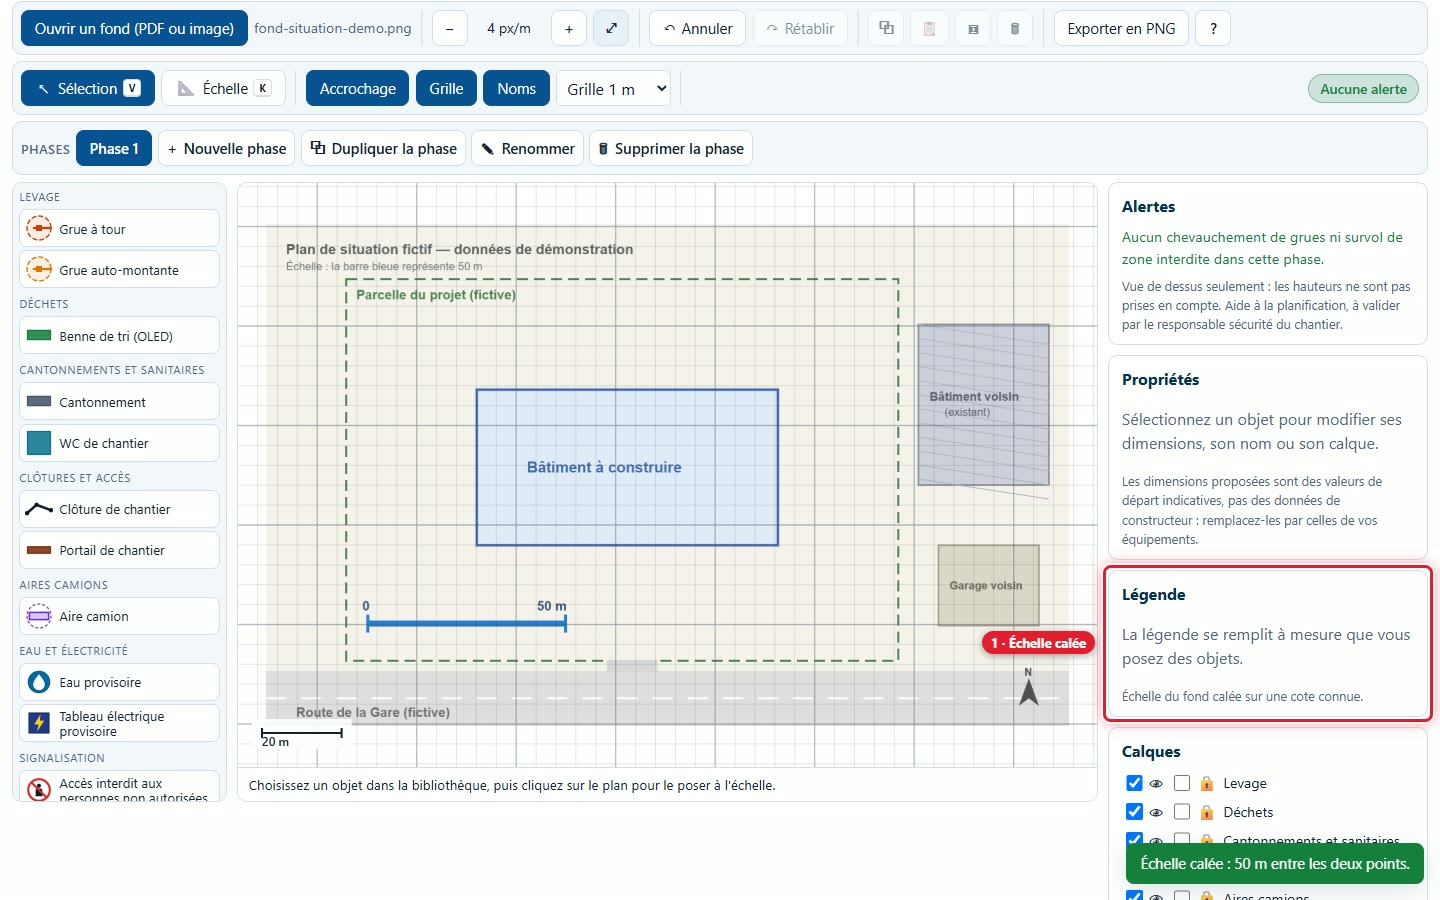
3. Placing objects
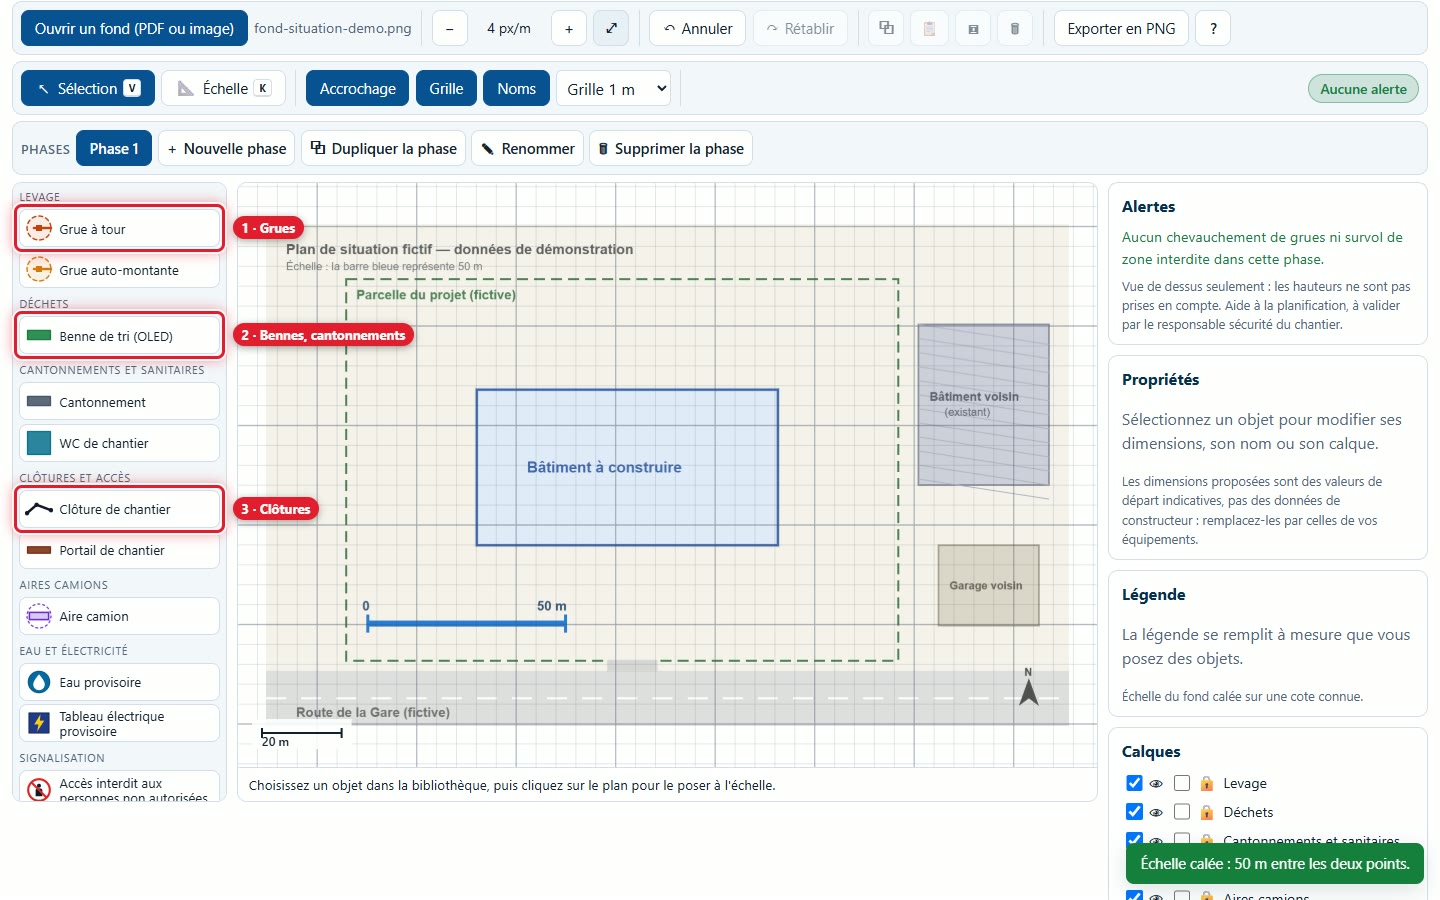
5Choosing from the library
The library offers 19 types of objects, arranged in 8 categories: lifting (cranes), waste (sorting skips), site welfare and sanitary facilities, fences and access, truck areas, water and electricity, signage, zones and extents. Click an object, then click on the plan to place it.
6Placing a crane
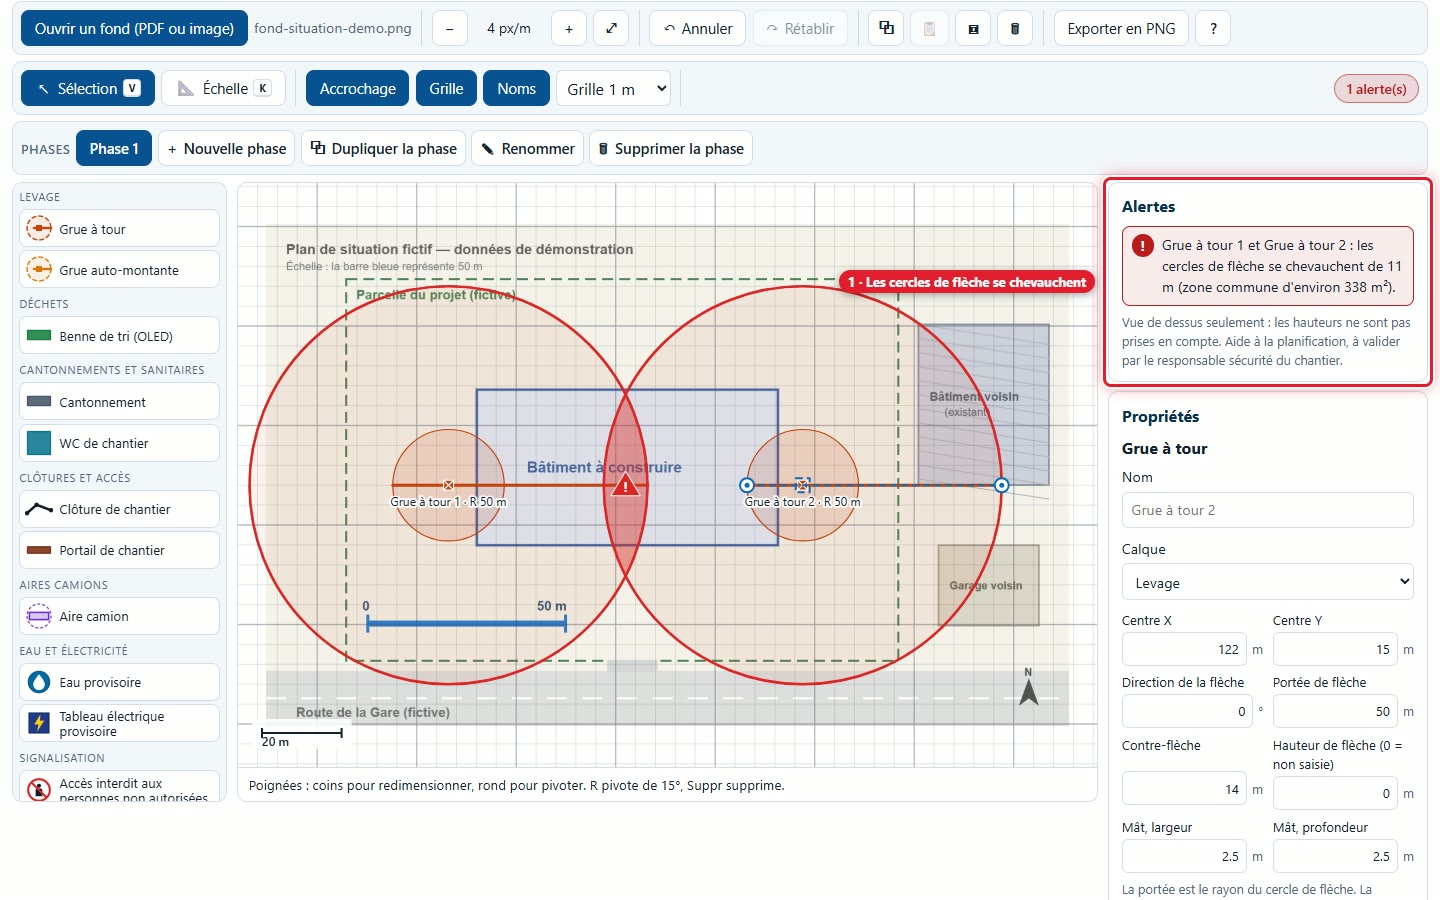
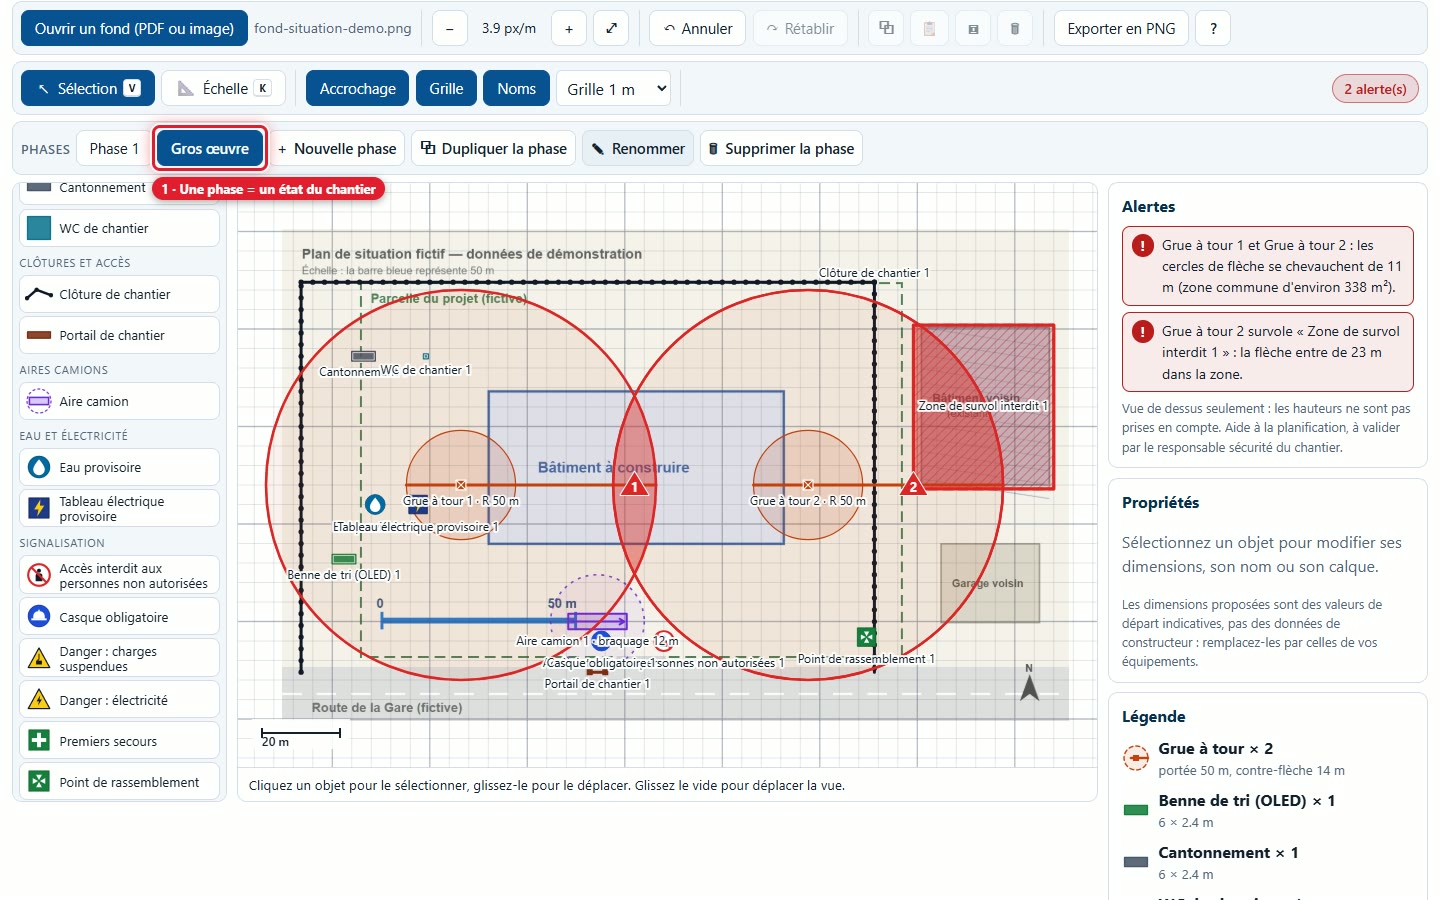
Click Tower crane, then the plan: the studio draws the jib circle (50 m radius initially) and the counter-jib. The video shows the gesture. A self-erecting crane is placed in the same way.
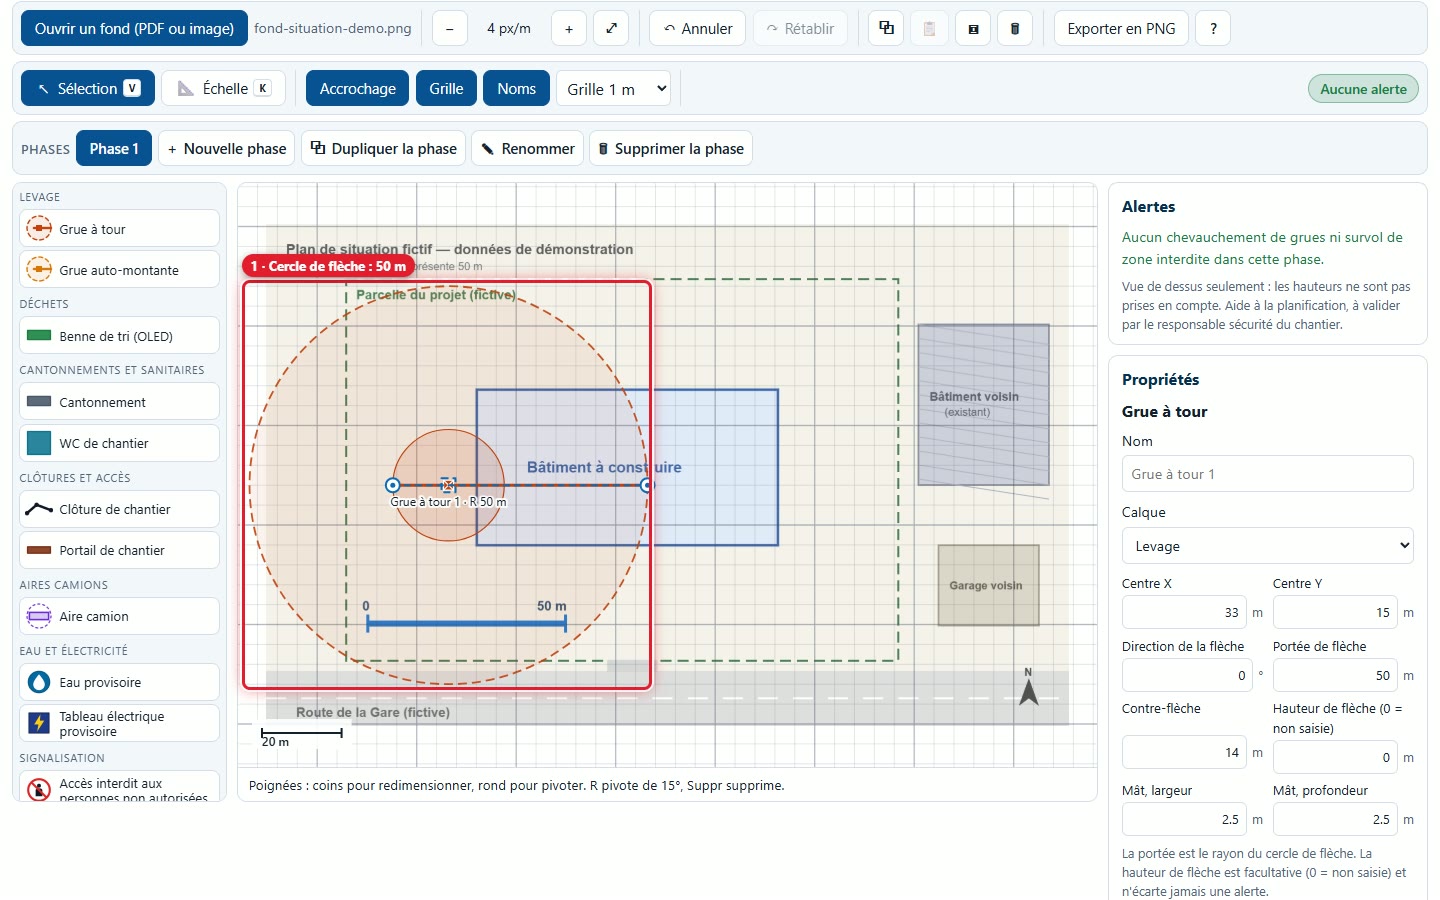
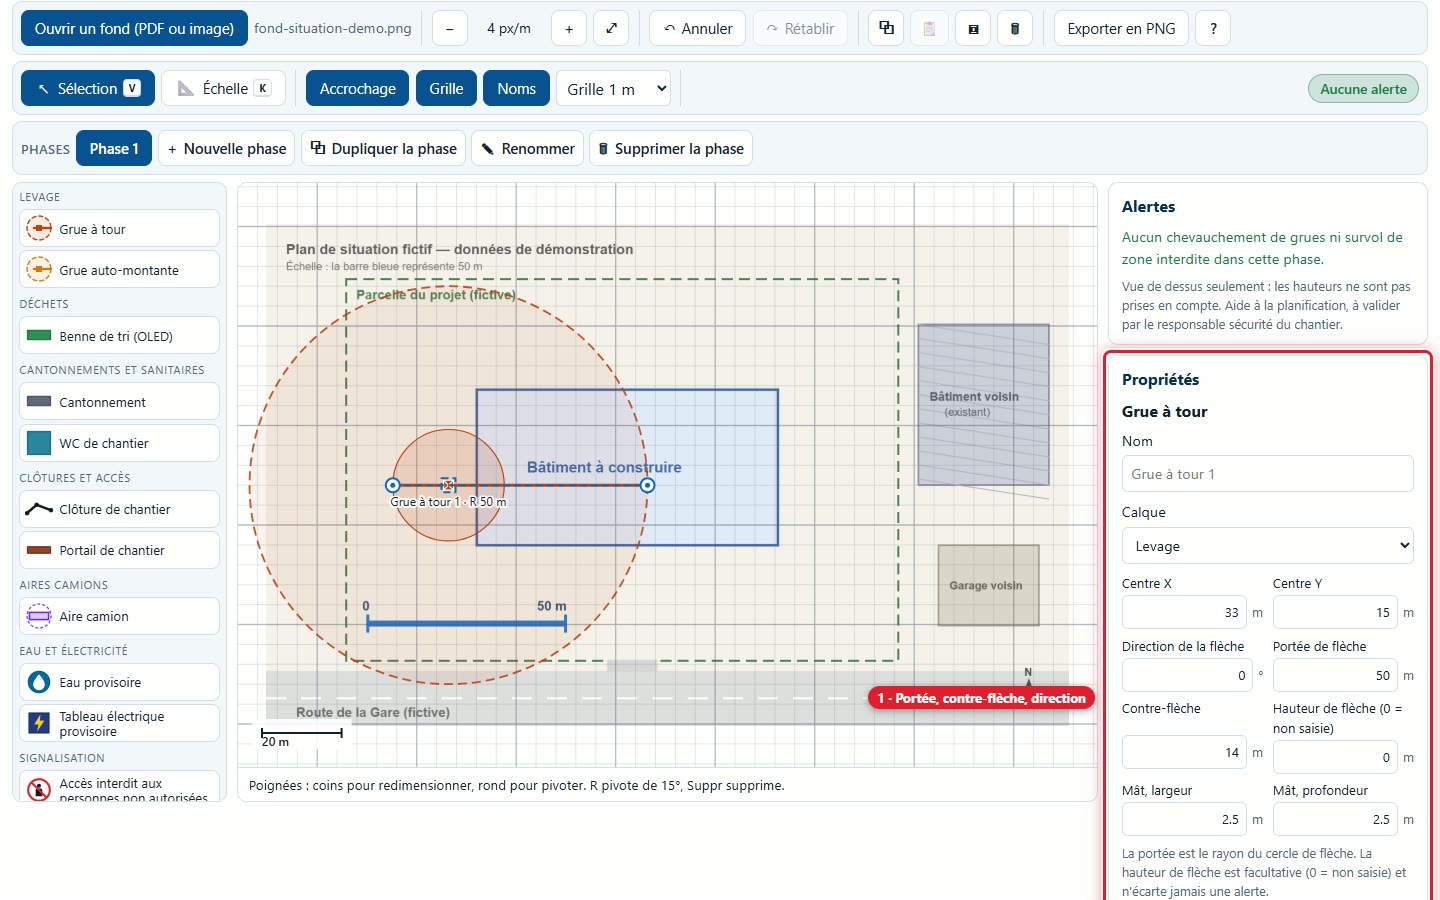
7Adjusting a crane in the properties
When an object is selected, the Properties panel gives its name, layer, position, rotation and dimensions. For a crane: jib reach (circle radius), counter-jib, jib direction, mast size and jib height (optional, 0 = not entered).
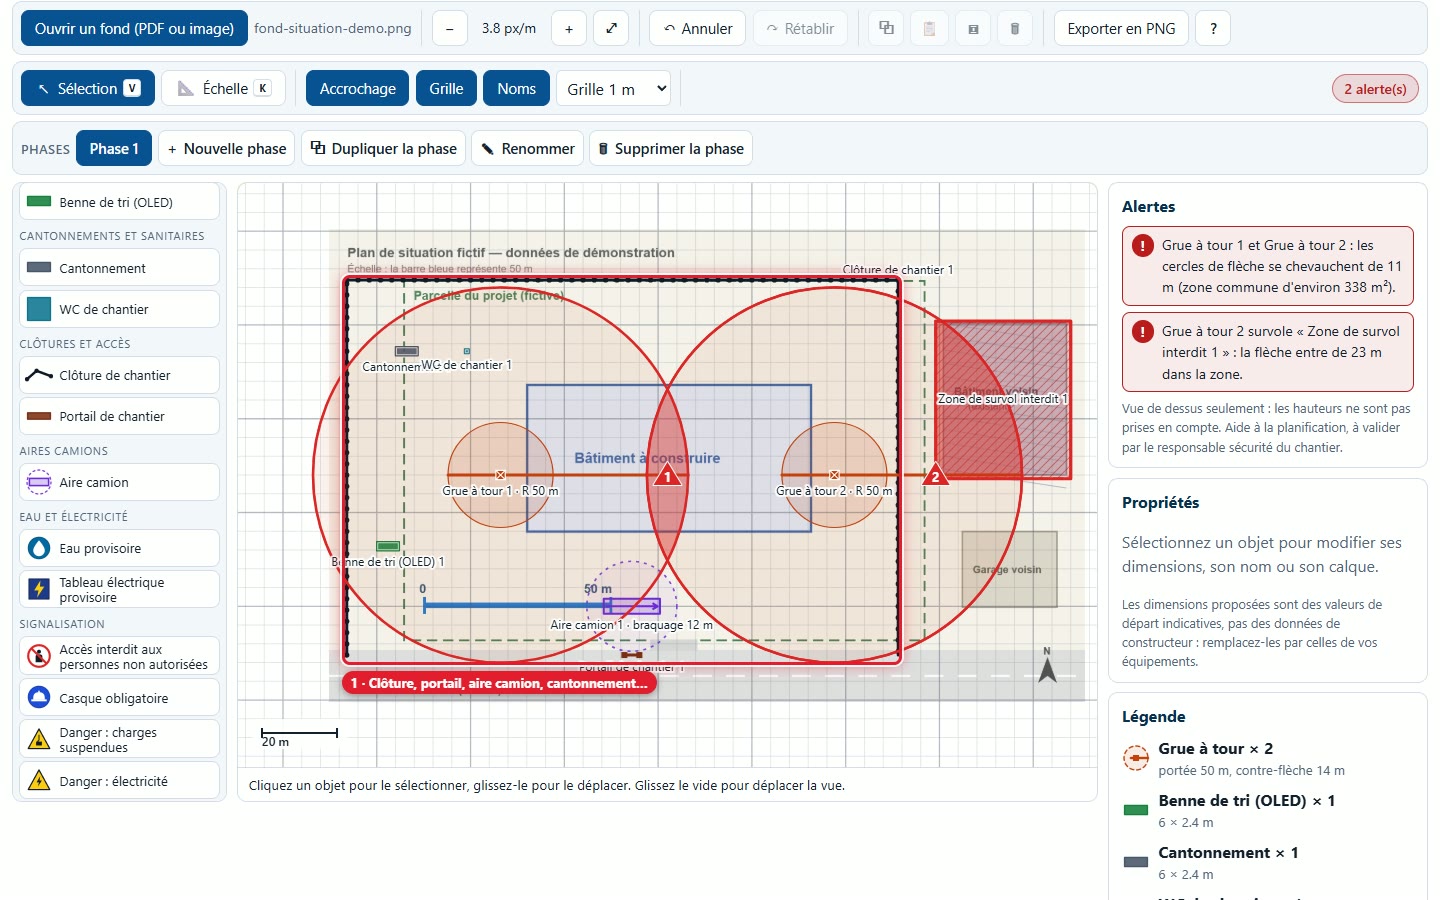
8Placing a skip, site facilities, WC, truck area, and gate
These objects are placed with a single click at their actual size. The truck area also shows a turning radius circle, to be replaced by that of the actual truck. To rename an object (for example a « wood » or « inert » skip), change its name in Properties.
9Drawing a fence or a zone
For a fence or a zone, click each vertex. Finish with F, a double-click, or a click on the last point; Backspace removes the last point, Shift keeps the right angle. To modify the path afterwards, drag a vertex; a double-click on a side adds a vertex, on a vertex it removes it.
10Zooming with the scroll wheel
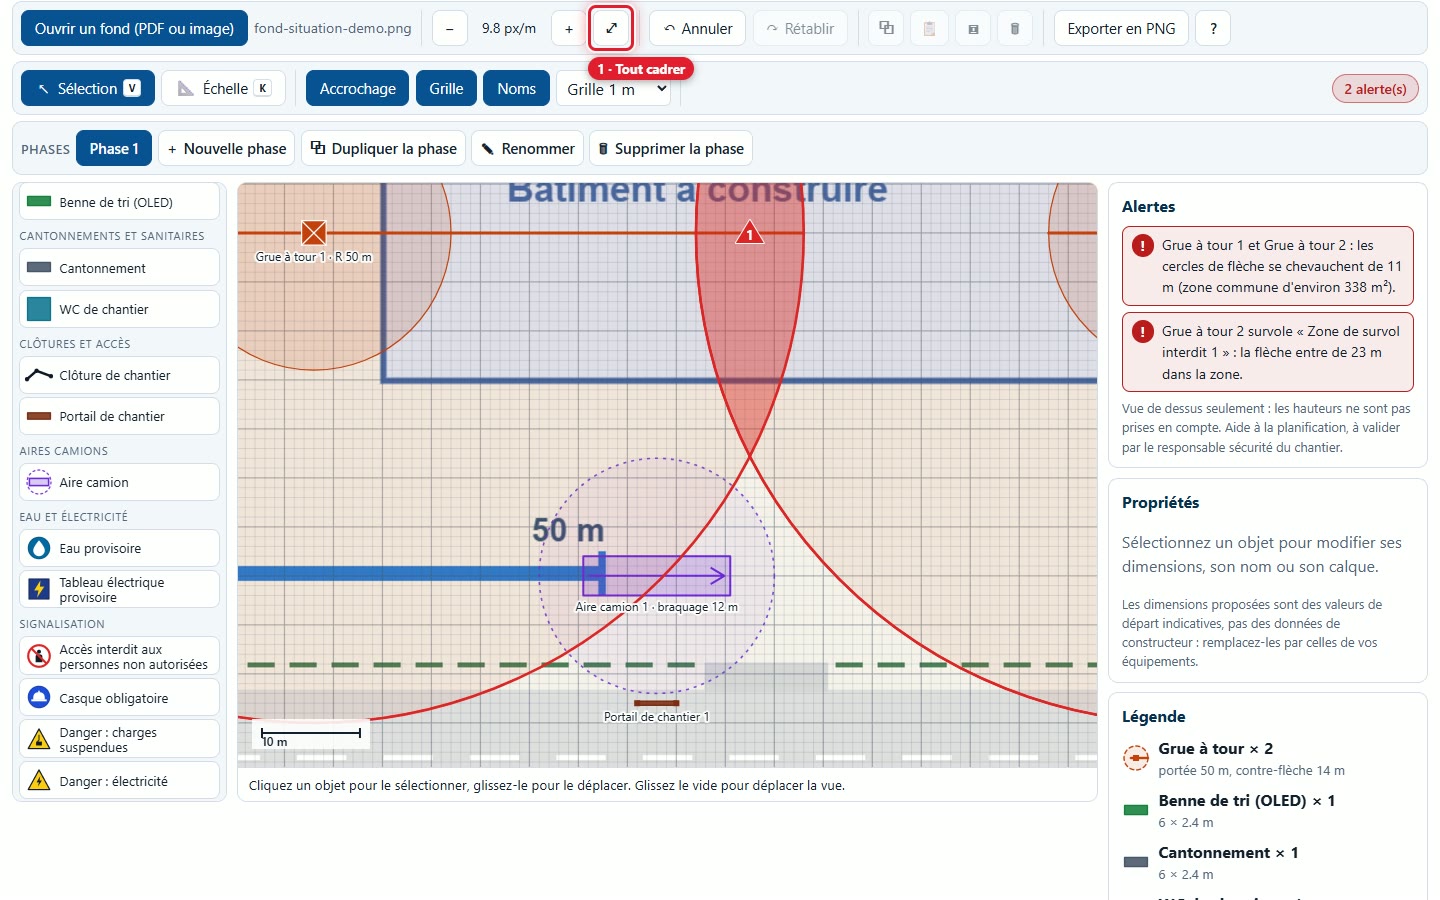
The scroll wheel zooms on the point under the cursor; the −, +, and ⤢ (zoom to fit) buttons do the same. To pan the view, drag on empty space, or use Space and drag.
11Signs, water, and electricity
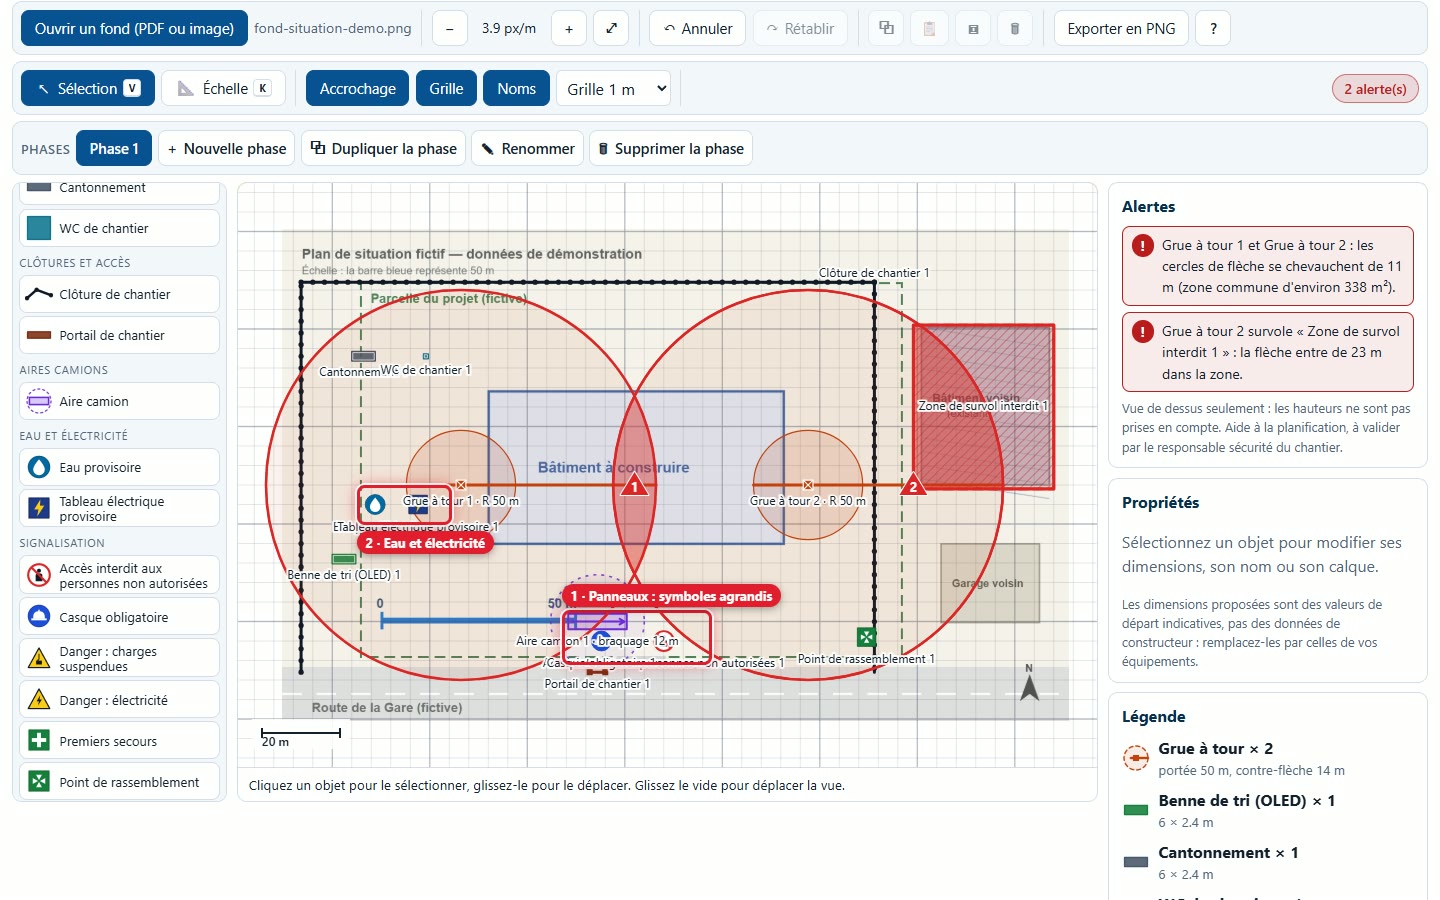
Six signs (no entry, hard hat, suspended loads, electricity, first aid, assembly point), temporary water, and the electrical panel are enlarged, out-of-scale symbols: the legend states this. They do not replace regulatory signs.
4. Alerts
12Two overlapping cranes
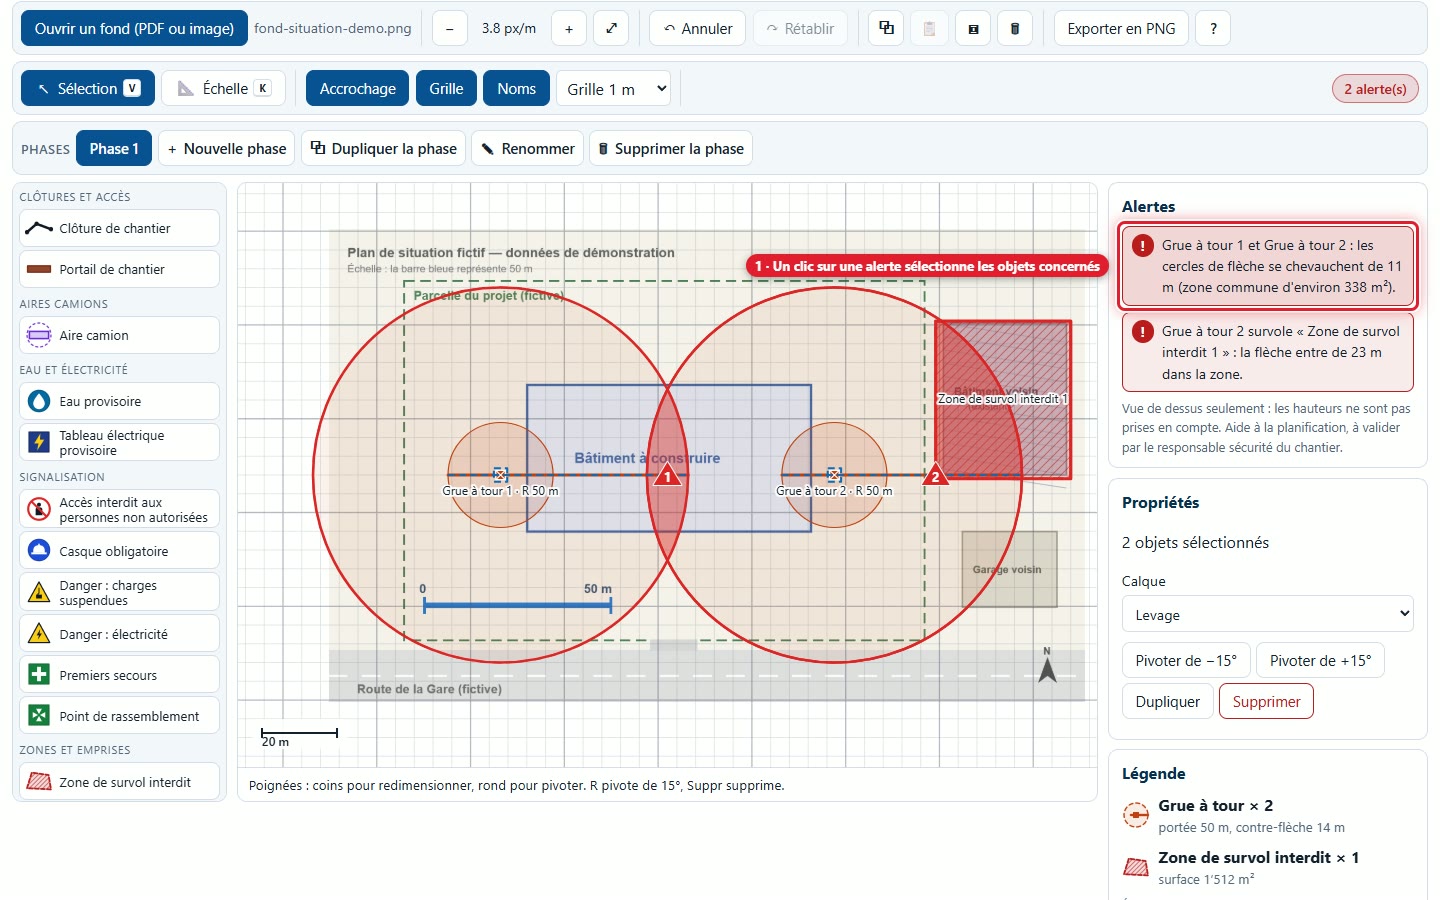
When two jib circles overlap, the studio colors the common area in red, places a numbered marker, and writes the alert: how much the circles overlap and the common area. Two merely tangent circles do not count.
13Drawing a no-slew / no-oversailing zone
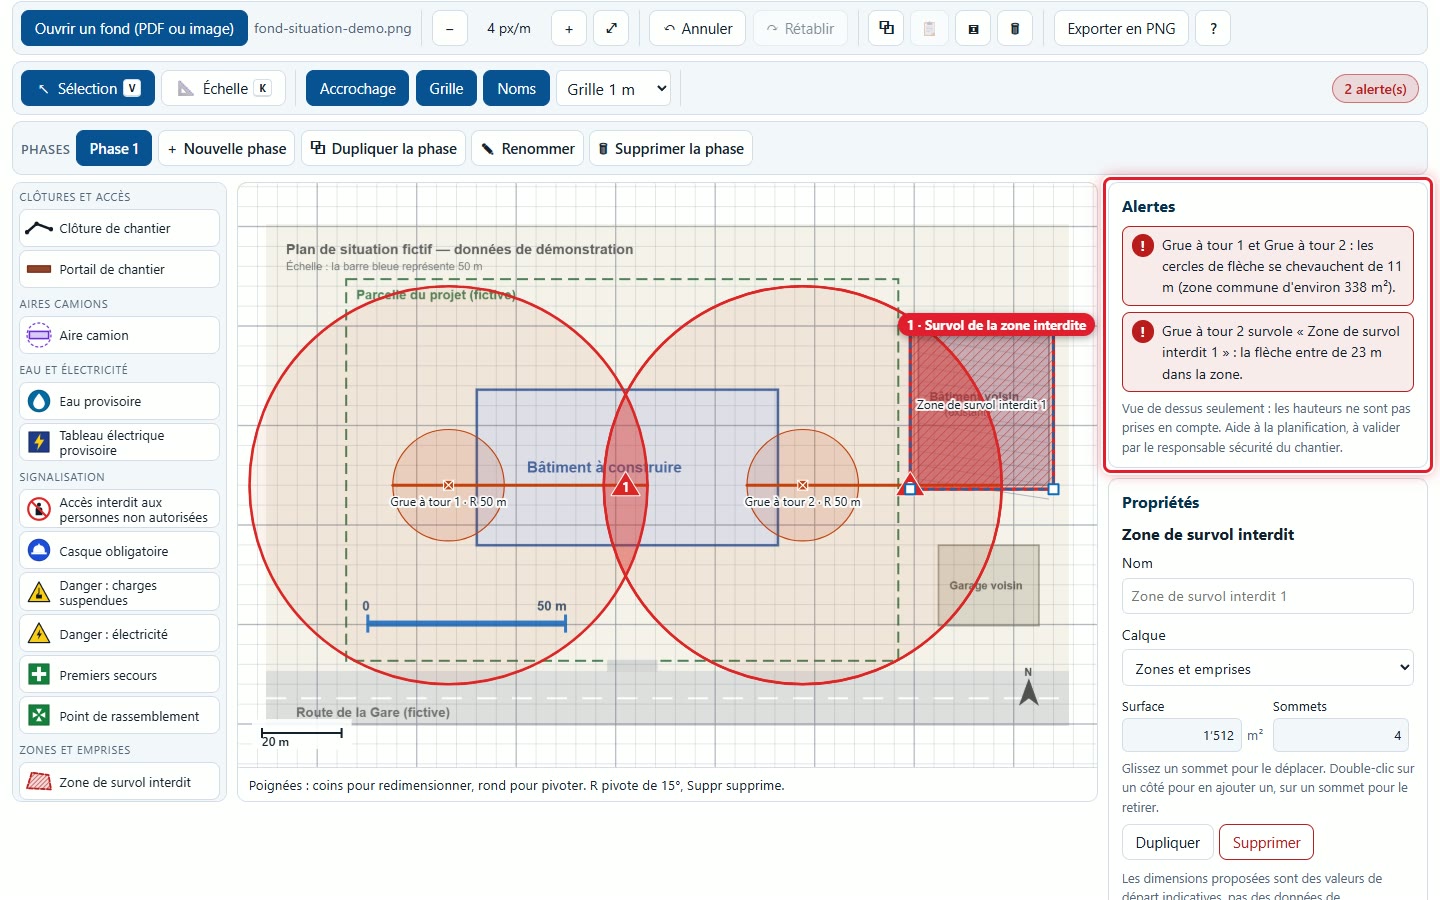
Choose No-slew / no-oversailing zone and draw the outline, for example of a neighboring building. A jib, counter-jib, or mast that enters the zone triggers an alert stating how much it enters. The video shows the drawing process.
14Finding an alert on the plan
Click an alert from the list ("Show on plan" tooltip): the studio selects the relevant objects, both cranes or the crane and the zone, and brings the plan back to the screen. The "n alert(s)" badge above the plan shows the number of alerts.
15Shortening a radius: the alert disappears
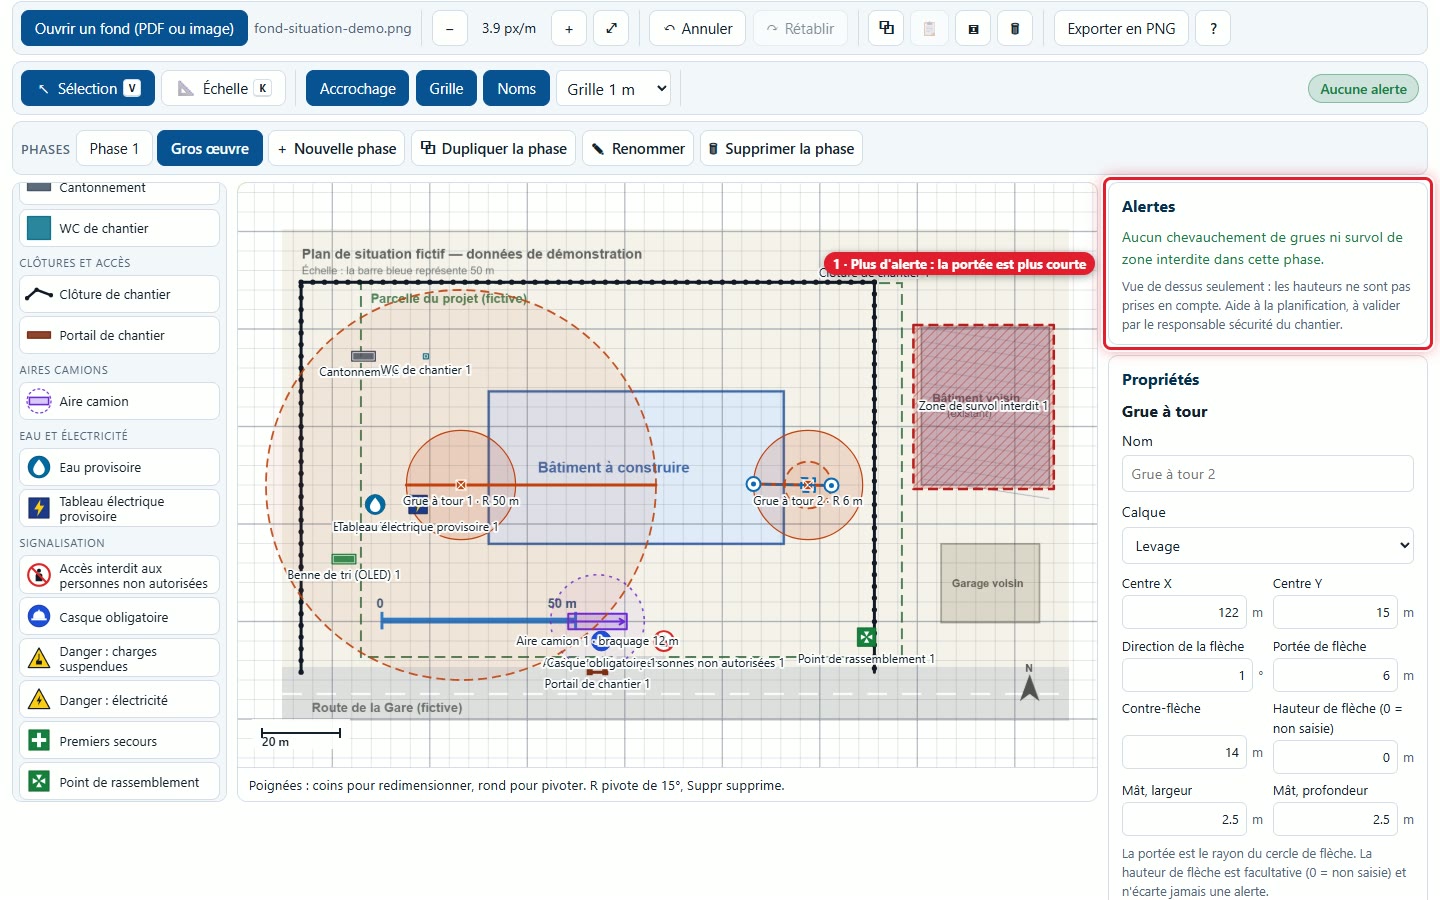
Select a crane and drag the handle at the end of its jib: circles and alerts update live. You can also enter the radius in meters in the properties.
5. Legend, layers, and phases
16The legend fills itself automatically
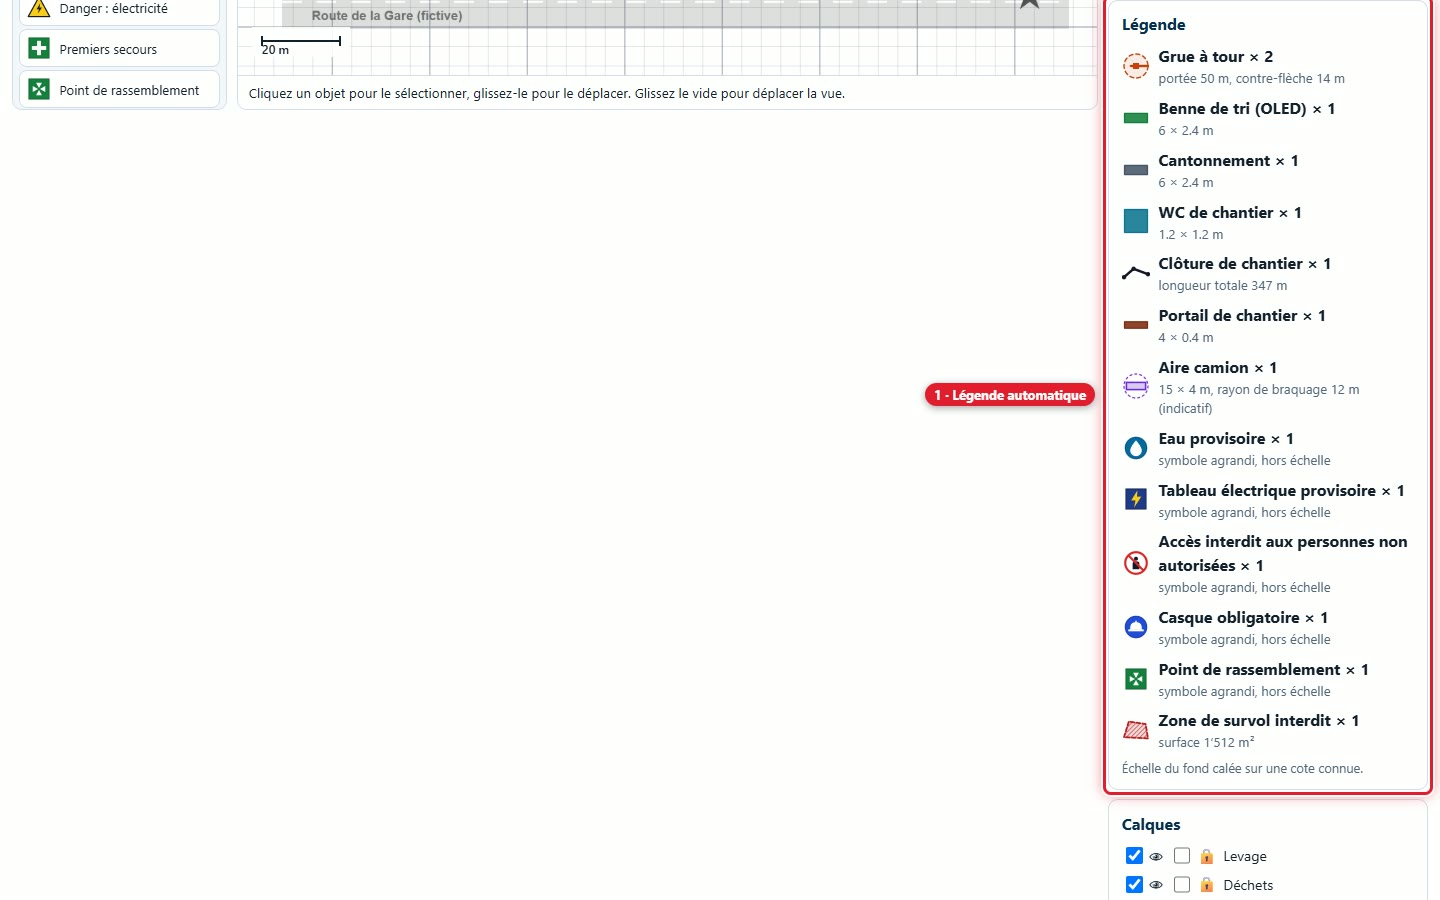
The Legend groups objects by category, gives the count of each and the actually entered dimensions (one line per size), the total fence length, and the zone area. It is also drawn in the export.
17Hiding or locking a layer
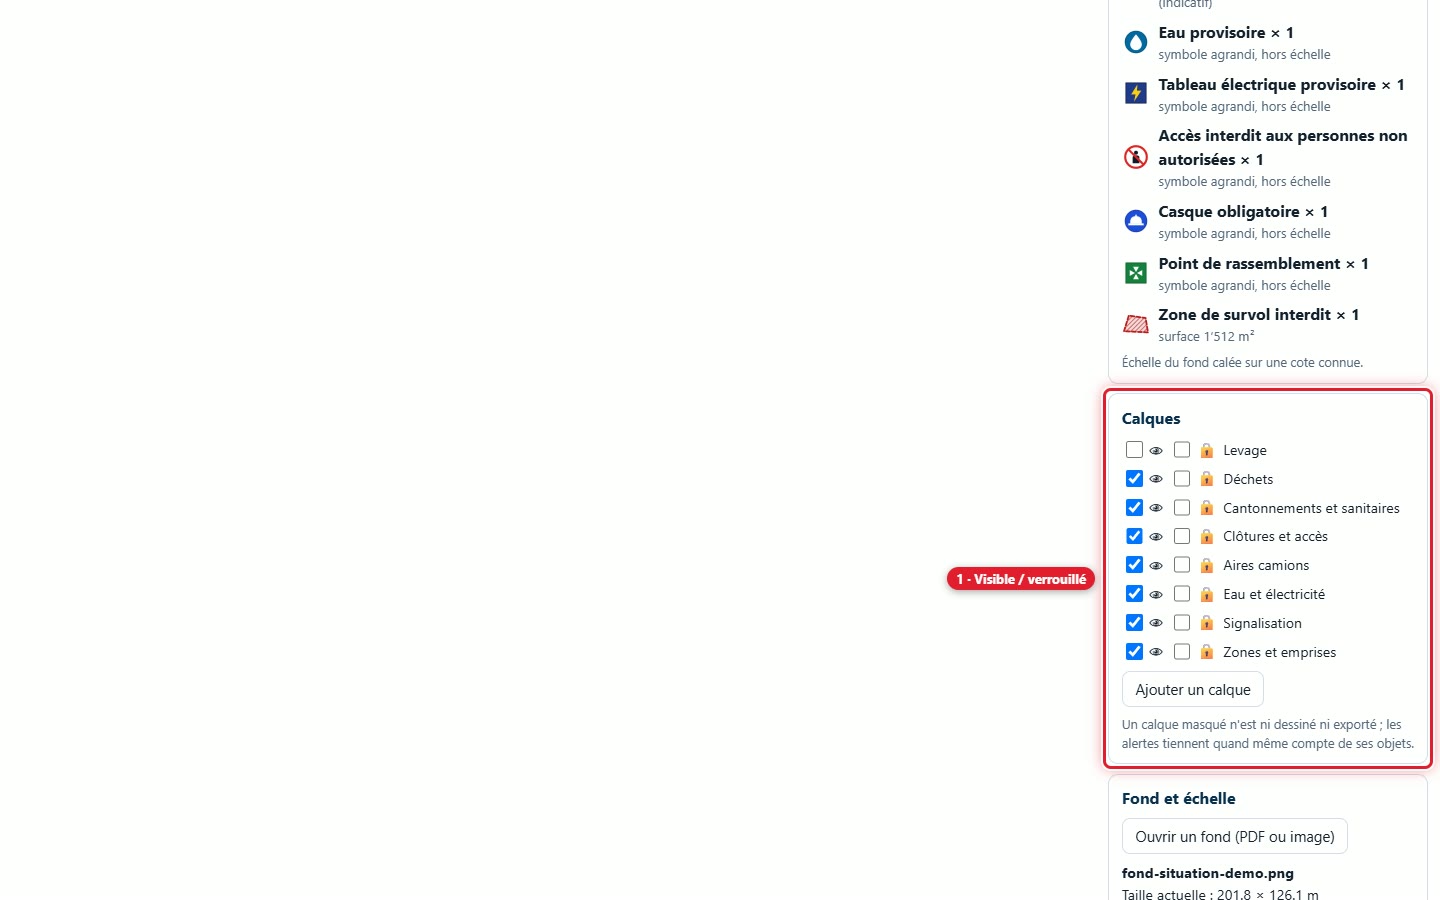
Each category is a layer. In Layers, the first checkbox hides or shows the layer, the second locks it (a locked object cannot be selected or moved). You can add your own layers.
18Alerts also count hidden layers
A hidden layer is neither drawn nor exported, but its objects still count towards alerts: an alert does not disappear just because a layer is hidden.
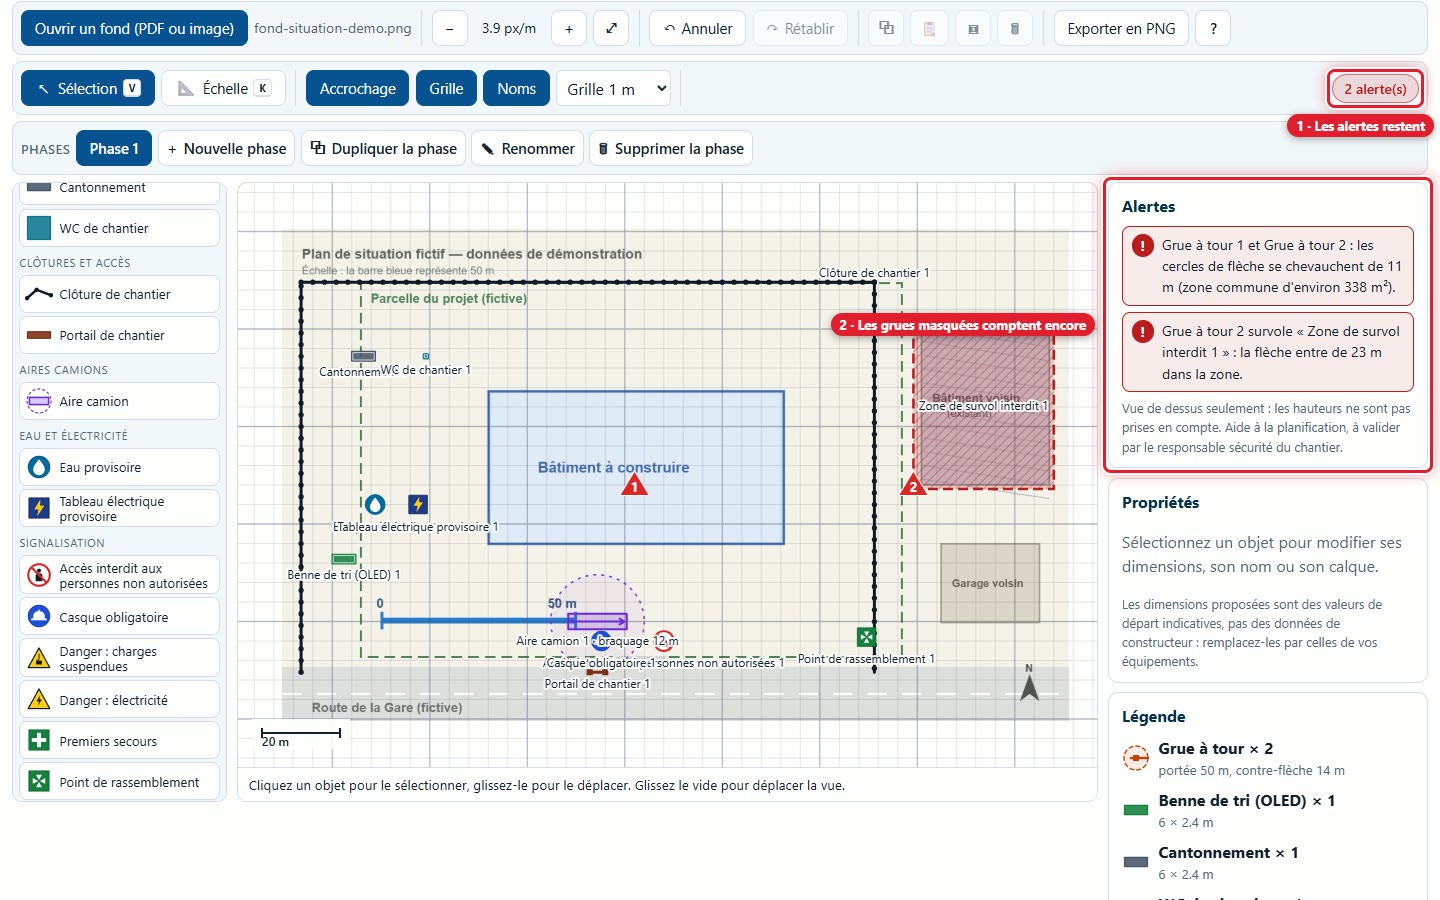
19Multiple construction site phases
The phase tabs (New phase, Duplicate phase, Rename, Delete phase) allow you to draw several states of the construction site. The background, scale and layers are shared; the objects are specific to each phase. Undo and redo also cover phases.
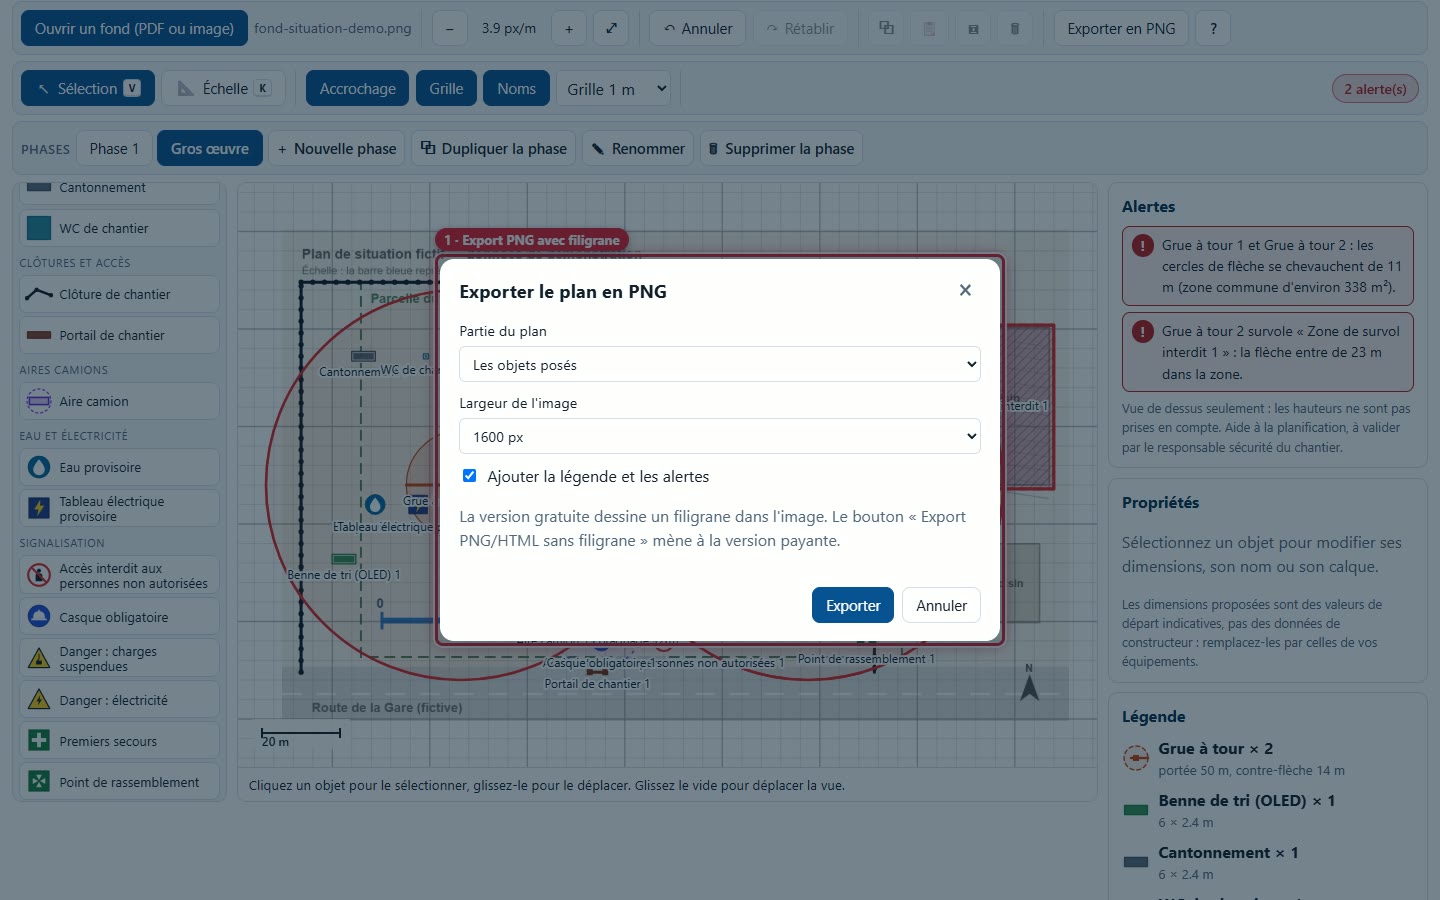
6. Exporting the plan
20Choosing PNG export settings
Click on Export to PNG. Choose the part of the plan (placed objects, current view or entire background), the image width (1200 to 2400 px depending on the list) and whether the legend and alerts are added. The free version draws a watermark in the image.
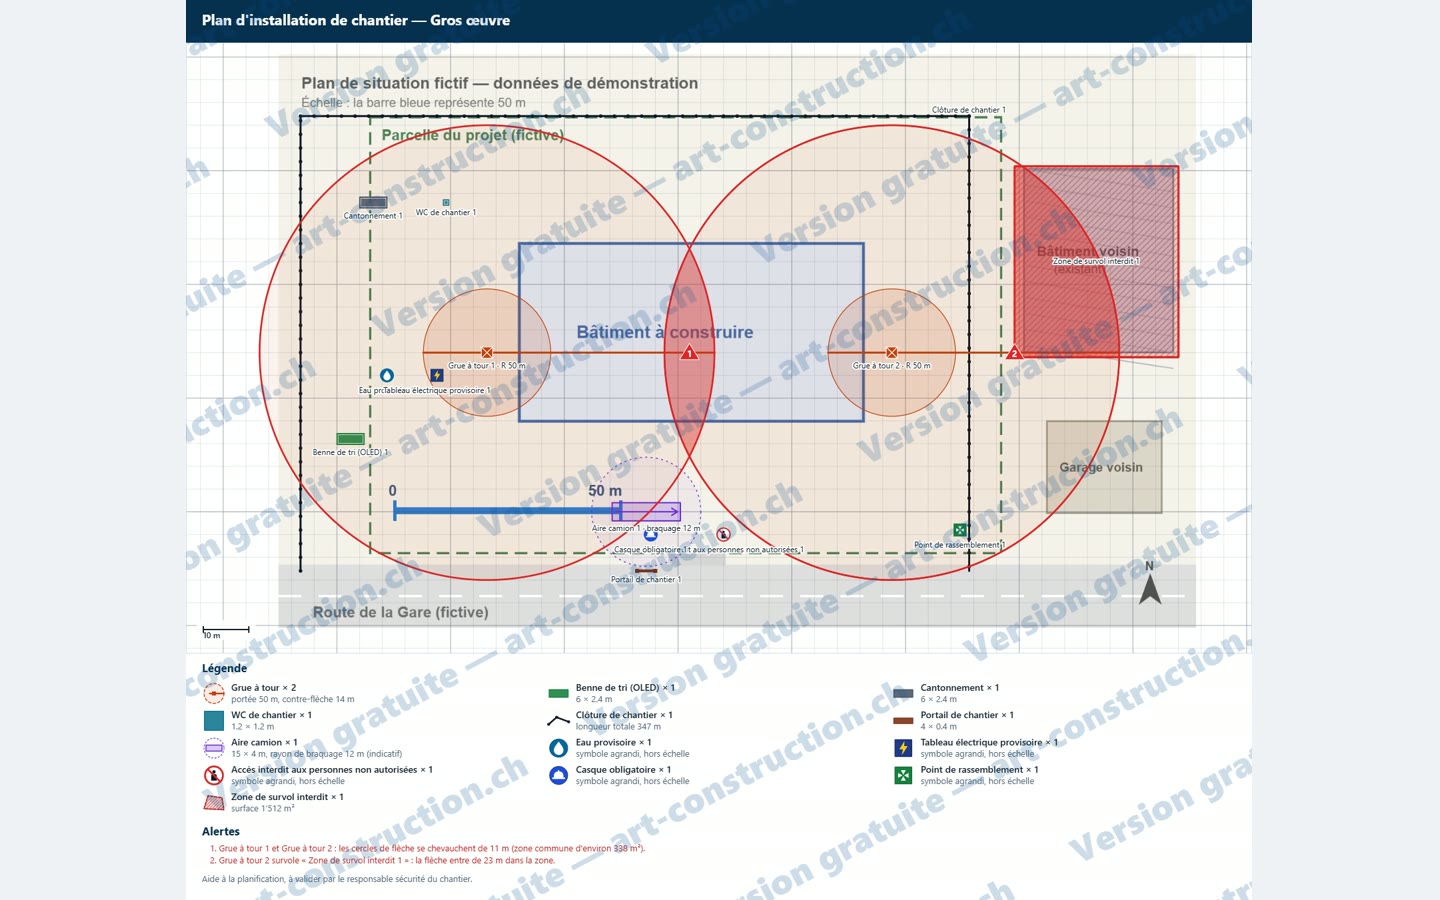
21The result
The exported image contains the plan, the legend and the list of alerts. In the free version, the text "Free version — art-construction.ch" is repeated diagonally across the entire plan.
7. Keyboard, touch and shortcuts
22Everything can also be done using the keyboard
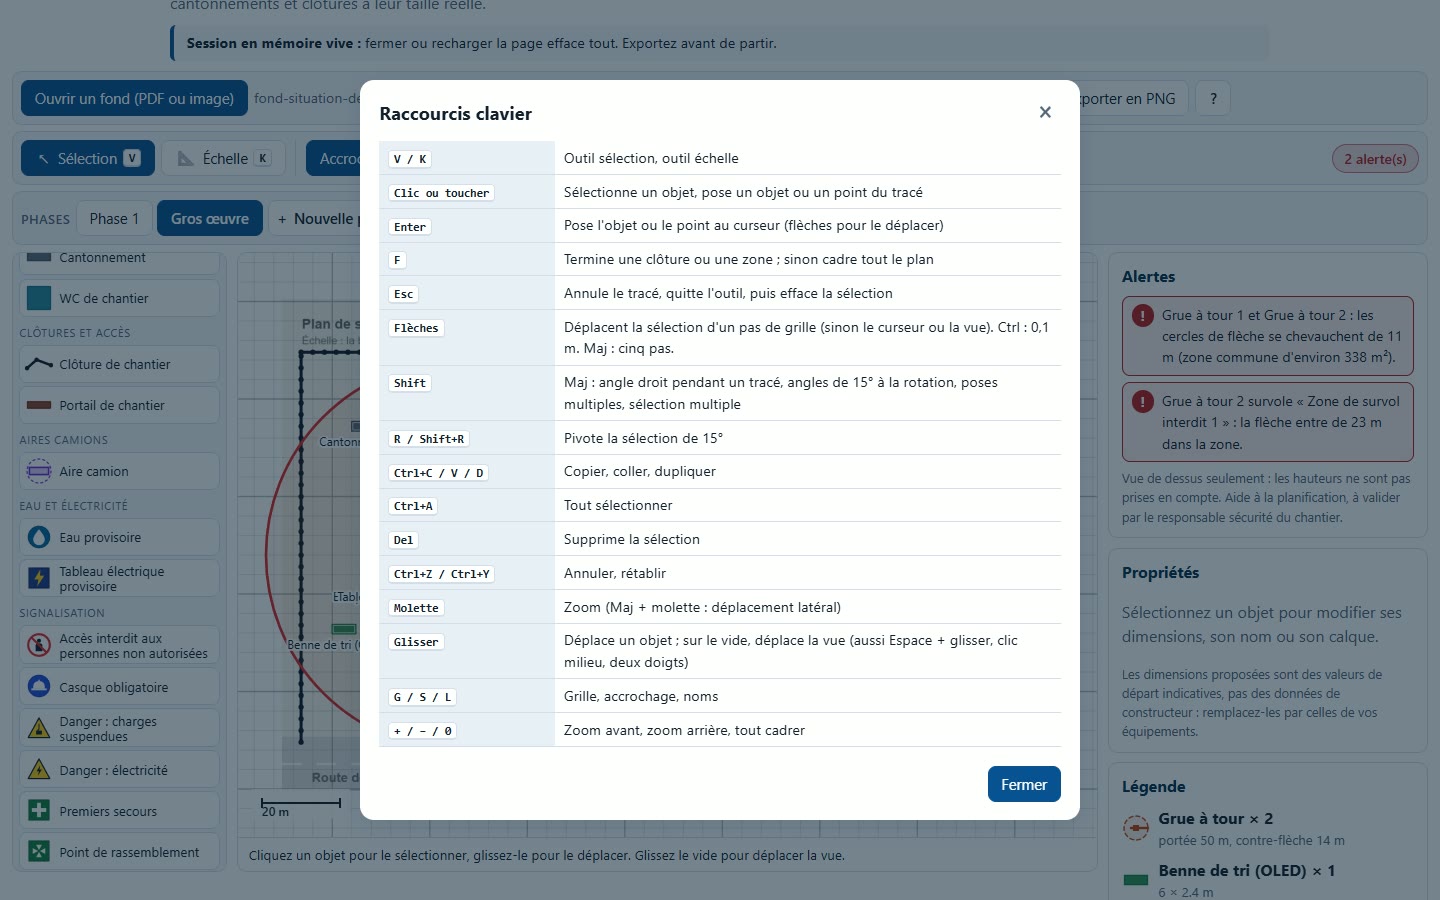
The ? button lists the shortcuts: Enter places the object at the cursor, the arrow keys move the selection by one grid step, R rotates by 15°, Delete deletes, Ctrl+Z undoes, G, S and L change the grid, snapping and name display. On touch screen: a tap selects or places, two fingers zoom and pan the view.
8. What the Pro version adds
23The five Pro buttons
The PRO buttons below the plan are visible in the free version and open an invitation window: saving phases on a construction site, loading a project, estimating with the ACIP database, working in a team, exporting without a watermark.
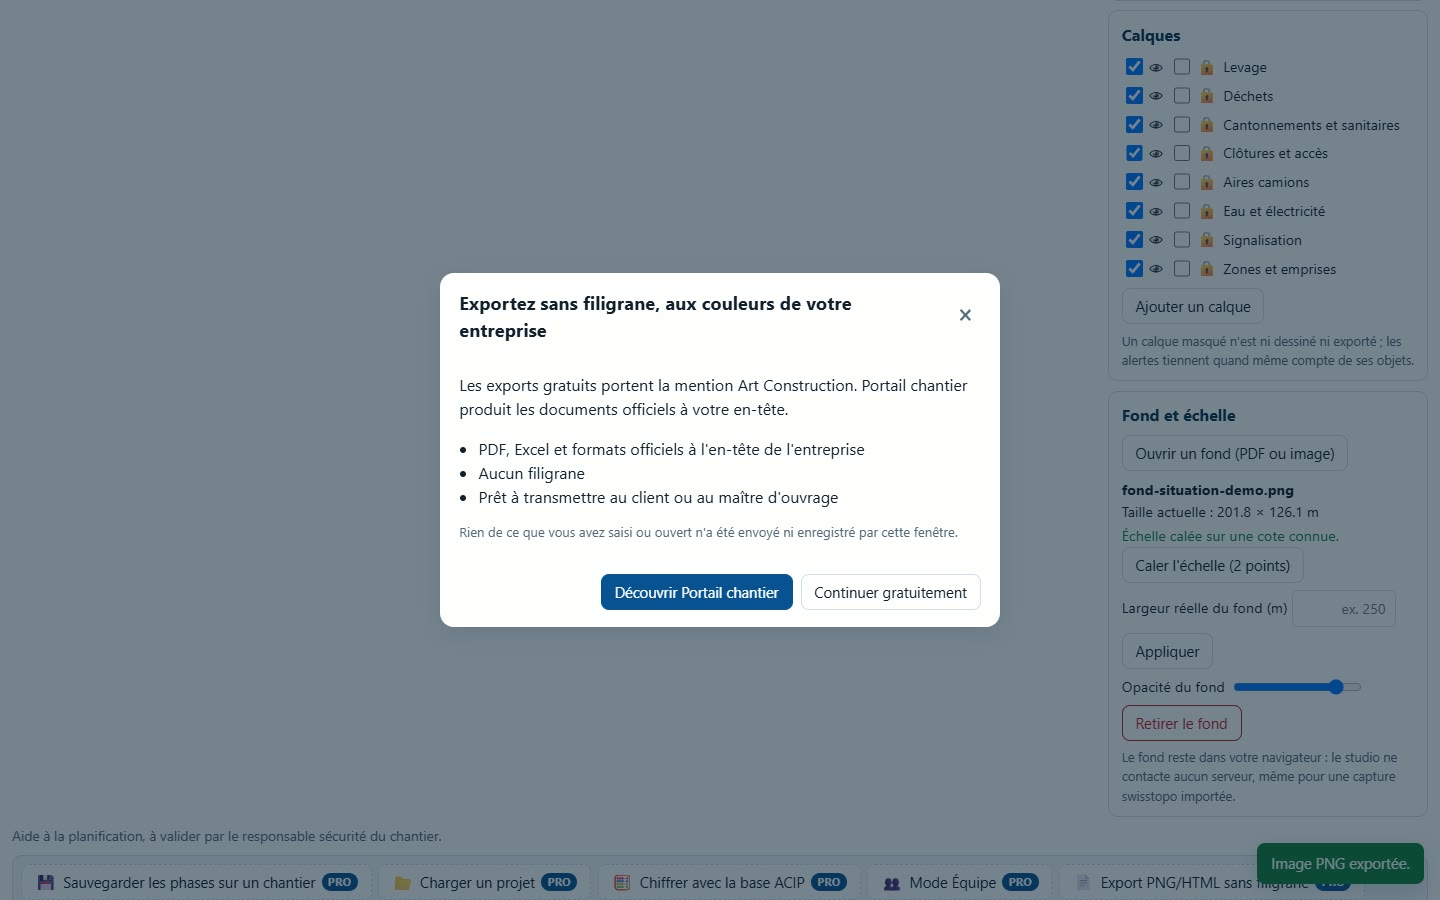
- save all phases of the plan on a construction site, with its versions, and reopen it (background alignment is saved, not the image: it must be re-imported);
- export to PNG or HTML without a watermark, with all phases, the legend and alerts, with the company header (name, colour, logo).
9. What this software does not do
- It draws in top view only: no height is taken into account, and it does not calculate loads, safe working loads or wind. The safety officer approves the plan.
- The library dimensions are indicative starting values: it contains no manufacturer data.
- The signs are simplified, unofficial symbols: they do not replace regulatory signs.
- It does not read the scale or dimensions of a PDF: you set the scale yourself.
- The PDF background is rendered only once: when zoomed in a lot, it becomes blurry. The background cannot be rotated or moved.
- Zones and fences are simple polygons without holes.
- It saves nothing in the free version (saving is reserved for the Pro version) and contacts no server.
- Copy-pasting remains internal to the studio: it does not copy to other applications.
A question? Send a request to support.